
Sign up for The Wanderful newletter
Join our growing community of people looking to live the simple life!
Let’s build your van now
Join our growing community of people looking to live the Simple Life


)
Roof Racks are one of the easiest ways to add extra space to your tiny home. These days, it’s rare to find a converted van without some form of rack mounted to the top.
While roof racks aren’t always necessary, for example, if all you’re looking to mount are some solar panels, they do provide a simple way to add other adventure gear and storage capabilities that you may not have considered, such as:

Whether you plan on purchasing a custom-built rack, an out-of-the-box solution, or building one yourself, your roof rack should be planned in the early phase of your build design.
You need to take into consideration the placement of your:
You may even want to build an area of the roof where you can sit and watch the sunset.
Lack of pre-planning is often what leads people down the path of having to make their own roof rack or spending more money on a custom-built solution.

The leading companies in the space are:
View this post on Instagram
View this post on Instagram
View this post on Instagram
View this post on Instagram
Some companies have more of a slimline, sleek, and minimalist look. While others have a more rugged feel.

Depending on where you live, ordering a roof rack and having it shipped to you can be quite expensive.
I had originally wanted to purchase my rack from Aluminess, however, at the time, shipping to Canada was extremely high. Aluminess has since come out with a modular design that packs down much smaller. They also offer free US shipping on this product.
I ended up building my own roof rack, with the help of a friend.
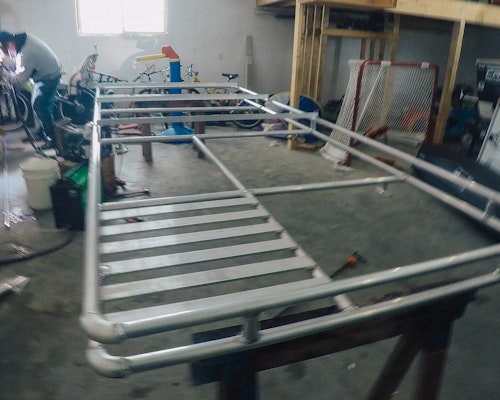
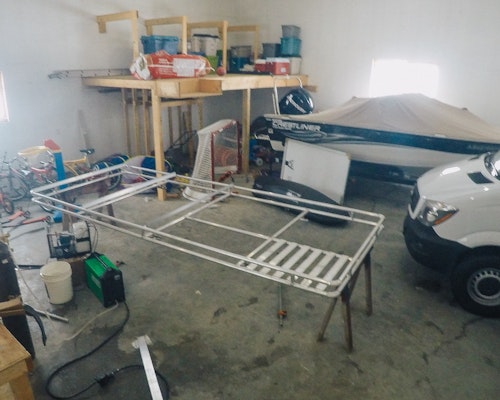
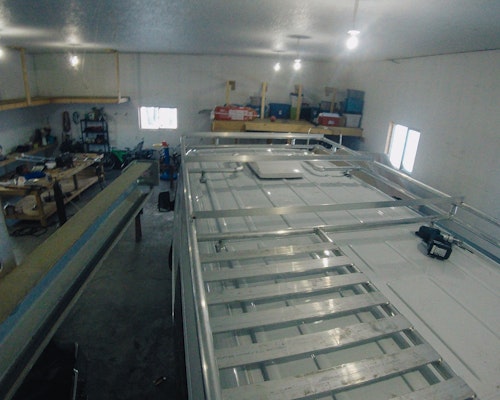
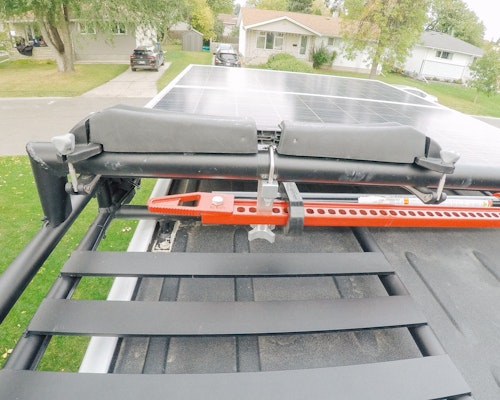


If you prefer the DIY approach, a roof rack is certainly a project that can be tackled with the right material and tools.
The benefit of making your own rack is that you can design it to accommodate your very specific needs. Typically, roof rack builders are building for the masses so depending on your needs, you may struggle to find something suitable out of the box.
The 3 most popular materials used for DIY roof racks are:
A lot of DIYers choose to use steel as it is easy to acquire and relatively inexpensive. However, I would advise against using it because it’s an extremely heavy material.
Most professional outfitters will typically use aluminum tubing because it’s lighter and makes for a perfectly strong roof rack.
I have also seen people use 8020 extruded aluminum roof racks. Extruded Aluminum makes for a great DIY material because it simply bolts together.
Overall, aluminum racks are almost as strong as steel but much lighter. I am always looking for ways to keep the weight of my van down so this is an important factor for me, personally.
One last thing relating to materials is that I would suggest powder coating your roof rack as a way of adding a bit of grip to it.
1. Plan your roof rack, solar panel, and vent fan simultaneously to ensure everything is accommodated.
2. Leading brands are: Aluminess, ROAMBUILT, and Backwoods Adventure Mods.
3. If you plan on building your rack yourself, I would suggest using aluminum tubing or extruded aluminum instead of steel, to keep the weight down.
4. Powdercoat your roof rack to add a bit of grip to it.
)
Whether you want to incorporate all the comforts of home into the van, or you’re gearing up for some adventurous offroading, you may find yourself with a long wishlist of upgrades for your van.
)
If you’re shopping for a Sprinter Van and struggling to choose between the 144″ or 170″ wheelbase, you’re not alone.
)
Looking for some camper van bed inspiration?