Summary
It’s important to know, going in to your build, that installing cabinets in your van is a pretty large undertaking. Rest assured that as long as you take your time and do your research, you will definitely be able to handle it.
Personally, I had never done anything like this before. I was a bit intimidated by the entire process but as soon as I got started, things started to make sense. Before I knew it I had created some pretty sweet custom cabinets inside the van.
There will come a point where the cabinets feel like a never ending saga. With the staining, sanding, painting, more sanding, mounting, shimming, and touch up… It’s by far the most consuming part of the entire build. Don’t give up!


Tools used


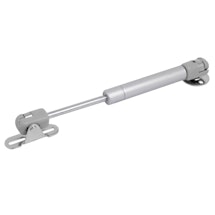
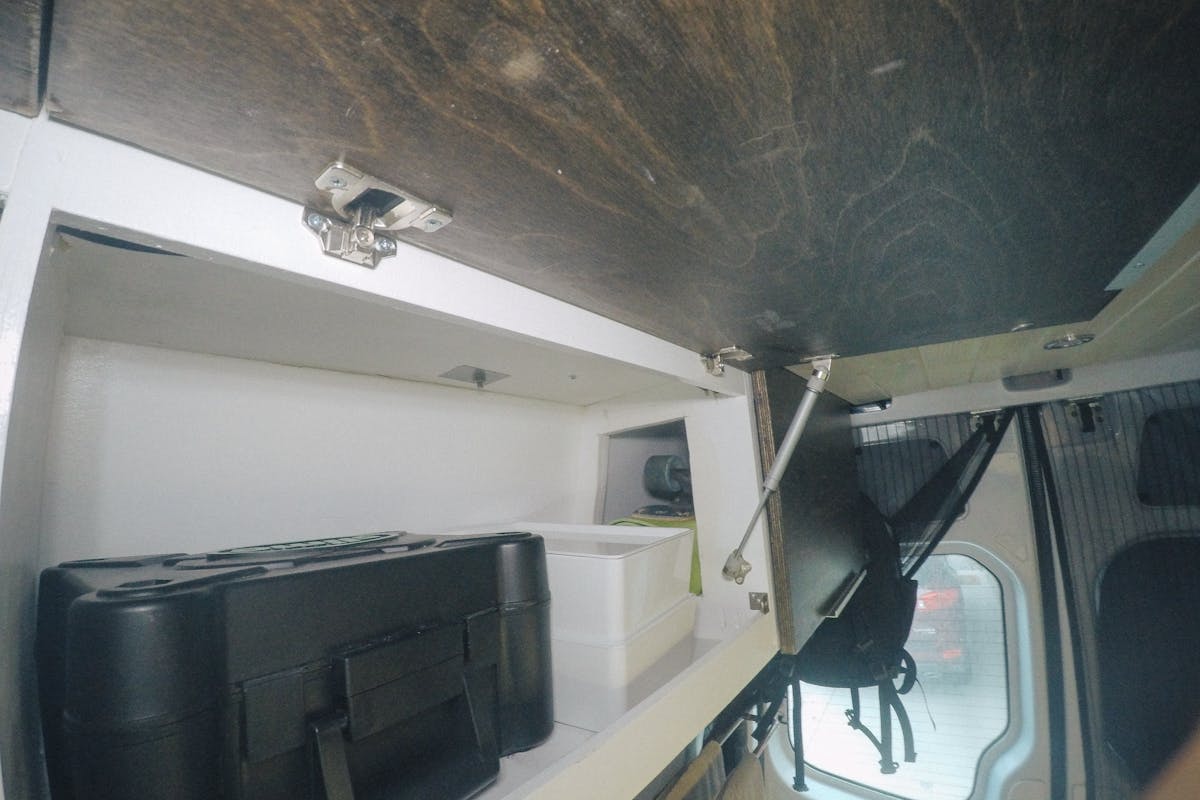
On my upper cabinets and back becnhes I used these gas shocks to hold the cabinets up while they are open. These shocks are very well built and do an excellent job keeping the cabinets open when parked and closed while travelling. Installing these shocks does take a bit of patience to get the mounting locations corret but once they are they dont require any adjustments.
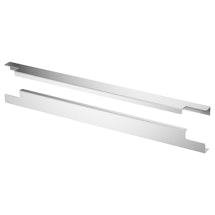
For thew handles on all of the cabinet in my van I used a simple handle from IKEA. I liked its simplicity and I felt that it went with my overall design for this project.
These are the original style sliders that I used "roller sliders". Im not sure if thats what they are actually called but its what Ive been calling them. This style of drawer slides is cheaper alternative to the ball bearing style but after 3 years in the van they were starting to warp and bend and a upgrade was required.
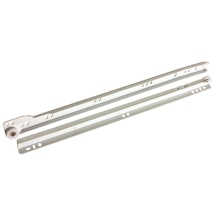
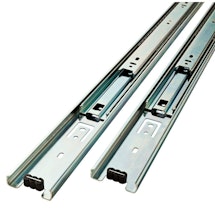
Originally I went with a cheaper drawer slider that didn't use ball bearings and had a roller wheel slider. But after a few years in the van I upgraded all the drawer slides to the ball bearing style and its a real game changer with the quality. The other style worked and if you are trying to save some money then I still recommend them.
Drawer Slide 2
This isn't necessary but there are a few areas in the van such as the back benches that I installed soft close hinges to eliminate the possible of the door slamming shut.
This is part of the project where you can really fail...If you don't take the time to properly paint your cabinets its a dead giveaway that your build was a DIY project. Ive seen so many people who rush this step and you can tell. Take your time, do mutliple coats, sanding between each coat and at the end you will leave yourself with a durable finish you can be proud of.

In my build I liked the aesthetic of leaving a lot of the wood grain exposed as you can see with my upper cabinet faces and butcher block counters. To achieve this look I used a dark stain and then sanded smooth before applying a few coats of a clear coat.

Anywhere in the van that I wanted to leave the wood grain exposed, I used a stain as the color treatment then applied multiple coats of clear satin or matte Varethane to give it a durable professional finish.
Clear Coat
In this project if you want to have a high quality finish you are going to need a lot of sand paper. In between every coat of paint and stain I sanded the faces down smooth before applying another coat. Also between every coat of clear they were sanded smooth before the final coat. This step is very time consuming but in the end it really gives you are finished look and feel and makes your surfaces easily cleanable.

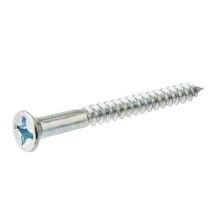
In my build I used a ton of different sizes and lengths of screws depending on what application I was using it for.
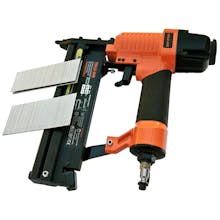
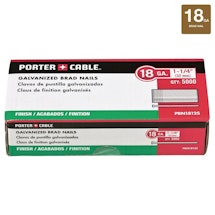
When I was putting up the ceiling planks I used brad nails that were about 1/2 inch to ¾ just for tacking the planks in place while the construction adhesive dried.
Any time you are doing any sort of finishing wood work such as cabinet work you should be using glue along all your joints. Wood Glue increases the overall strength of the cabinet and will help eliminate it from getting damaged as you drive down the road in your new home.

For all my cabinety in the van I used Baltic Birch plywood. The main reason I used Baltic Birch plywood is due to its strength. Baltic Birch plywood has many more layers per inch increasing its overall strength.

The Springfield Gas Powered Table Pedestal will allow you to position your RV table at several different heights.

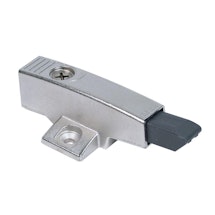
Since I've lived in the van for an extended period of time now, latches have been something that I've played around with a lot. Originally, I installed magnetic latches, which look great as they are hidden. They also worked great for the most part, but I found that if you overload the drawer and find yourself off-roading, they can open up on you. For that reason, I've changed all my latches over to slam latches.

Install Process
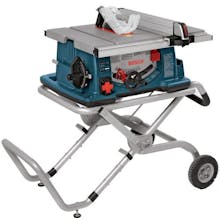
When it came time to start building the cabinets I really had no idea what I was doing… I started by watching a few YouTube videos and spending time reading over some blog posts before finally sliding my first piece of plywood through the table saw.
Material Selection
For my cabinets, I decided to go with Cabinet Grade Baltic Birch Plywood. The reason I decided to go with Baltic Birch Plywood over traditional plywood is that Baltic birch’s core is unlike the traditional plywood you may be used to seeing. The layers of inner plies are 1.5 mm-thick solid birch veneer, cross-banded, and laminated with exterior grade adhesive.
Baltic Birch Ply also has several structural benefits that make a good candidate in a vehicle that is going to be bouncing down the highway.
- Superior Screw Holding Ability
- Improved Strength and Stability
- Thicker Face Veneer
To date, my cabinets have held together amazingly well and none of the joints have started separate or have required any repairs. So although you are probably safe to use traditional plywood I can’t comment on how well it will hold up in this application.
Plywood Sizes
If you do decide to use Baltic Birch plywood, you’ will notice that it doesn’t come in the standard 4ft by 8ft sheets. and Instead, it comes in 5ft x 5ft sheets, which by the way makes them kind of a pain to transport to and from the lumber store as they don’t nicely fit in the back of a pickup truck.
- ¼ Plywood – This size of plywood is used for the backs of the boxes and bottoms of the drawers.
- ½ Plywood – Was used to build the frame of all the cabinet boxes and the sides of the drawers.
- ¾ Plywood – All of the doors and drawer fronts were made using the thick ¾ plywood.
Time to Start
Before you actually start cutting the cabinets, it’s a good idea to map everything out inside the van and to get a rough idea of how everything will fit together. I had seen other people that had used a 3D Modelling Program called Sketch.
I found SketchUp to be fairly easy to use. The program allowed me to create a rough outline of the van as well as a guide for building the cabinets inside the space. Once I had designed the layout inside SketchUp, the design changed very little from that original 3D design to what you see today inside the van.
Download Blueprints
Once I was happy with the design and feel of the 3D Modelling, I took Green Painters tape and mapped out the design inside the van on the floor. I found that by mapping everything out with tape on the floor I was able to get a real feel of how everything would fit inside the van and determine if any areas were going to feel cramped or awkward.
Starting to Build
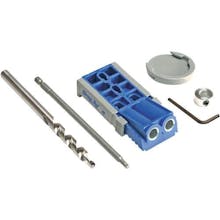
One of the hardest parts about building the cabinets is just finding the best technique. After doing a ton of research on cabinet building I found that a very common technique for creating strong cabinet and drawers was to use pocket screws.
Pocket Screwing using a Kreg Jig was a huge timesaver and made it possible for a guy like me, with zero cabinet experience, to make solid cabinets in the van.

Using the Kreg Jig was simple and easy to use. With a combination of using the Kreg Jig and well as gluing all of the pieces together using wood glue, all of the cabinets have held up amazingly well inside the van.
One trick I used when building the boxes was to use a small brad nailer to tack the boxes together and glue them before screwing them. I found that it made things much easier to keep straight and square.
Building the Benches and Bed
The first item I decided to build was the benches/bed section of the van. To me, this seemed like the simplest part of the cabinetry work and a good place for me to fine-tune my craft….
I used 3/4 Plywood for the benches because they would always be bearing weight in both bench and bed mode. I’m sure ½ would’ve been fine but the 3/4 just felt a lot more sturdy.


Building the bench was fairly straight forward and the only thing I needed to take into account was the wheel well in the vehicle. One thing I learned after I built the benches and lived in the van for the first 6 months was that I didn’t build the benches big enough…. Once I added the cushions to the bench it essentially shrunk the depth of the bench by 4 inches and made the benches pretty uncomfortable…. So I really recommend making sure you make your benches big enough, I was able to fairly easily fix my benches and it has made them 100x more comfortable. The current dimensions of my benches can be found below and now I am happy with the size of them.


Building the Kitchen Counter Unit
After I built the bench boxes, the next easiest pieces to build were the Kitchen counter pieces. The Kitchen counter pieces are made up of two boxes are that are identical in size and just have different door and drawer configurations.
The unit on the driver’s side of the van contains 3 slide-out drawers on the right-hand side of the unit and 2 drawers on the left. Inside the units on the right are basic Kitchen Items and the left has the large slide-out drawer to hold the fridge and a smaller drawer above it for the Kitchen Utensils and cutlery

The only thing that I had to do differently on the fridge drawer was that I installed a heavy-duty 20 inch, 200 lb drawer slide so it would withstand the weight of the fridge and contents.


When you move over to the passenger side of the van I used the exact same dimensions for the unit on the other side and just went with a different drawer and door set up to accommodate the sink, hot water tank, and garbage slide out.


One thing to note on building the bottom units is that I didn’t bother trying to accommodate the curvature of the vehicle and made the backs for the boxes square. In the sprinter van, the major curving of the vehicle doesn’t occur until you start to reach the ceiling of the vehicle and didn’t seem to affect the installation and mounting of the bottom cabinets.
Mounting the Lower Cabinets
I waited to mount the cabinets until I had all of the cabinetry completed as it just made it easier to work in the van when I could easily remove everything and take the measurements I needed in the van. One thing I wish I had was a garage to work on this part of the project because loading all of the cabinets into and out of the van each and every time I wanted to work on them was one of the biggest time-wasting events in the entire build process…. But you gotta do what you gotta do.


Once I had the cabinets built and it was time to mount the lower cabinets, it was pretty straight forward. When I framed up the inside of the van I made sure I had enough strapping in behind the ACP walls that I could easily screw the cabinets into the strapping and securely fasten them to the vehicle.

Something to be aware of is that when you are mounting the cabinets into the van, you need to is to keep a large square handy. I found that when I was fastening all the cabinets in place and screwing all the separate pieces together I neglected to use the square at first and what ended up happening is that everything was pulled out of square as I fastened it together and none of the drawers worked properly. Make sure when it comes time to install the cabinets that you take your time and when screwing things together don’t suck everything together tight without shimming areas that require it.
Install Counter
After the lower cabinets were completed it was time to install the countertops. As I talked about before I purchased a butcher block countertop from Ikea, sanded it down, re-stained it then sealed it with a food-safe sealant. The reason I applied my own stain to the counter was that I wanted the counter color to closely match the upper cabinets and Ikea had nothing in stock close to that color and since I had lots of stain left over it was the easiest option.
A few things to note regarding the counter is that I only wanted to purchase 1 piece of the butcher block counter to save some money. So I bought a large enough piece of butcher block and made by cabinets small enough that I could get away with cutting 1 piece of butcher block in half.
The hardest part of the countertop work was getting the sink and cooktop cutouts done properly.


By the time you get to the point of cutting in the cooktop and sink you have put quite a bit of work into the counters with cutting, sanding, staining, and sealing that error in measurements here would not only cost you money but considerable time. Before I started cutting out the openings for the sink and cooktop we created templates out of paper that we could use to trace onto the counter and use those lines to cut along.
Once the openings were all cut I placed the counters onto the cabinets and screwed from the bottom up to secure the counter in place. I chose not to glue down the counter in case I ever needed to take it apart for whatever reason.
Building the Upper Cabinets
The lower cabinet boxes were a bit easier to make than the upper cabinets but they still took a considerable amount of time because I also had to make 8 drawers which adds a lot of time to the project.


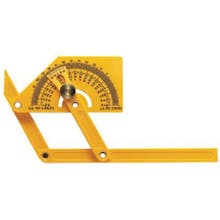
I found the hardest part about building the upper cabinets was finding the right angle at the top to follow the curve of the vehicle. On the bottom cabinets, the curve of the vehicle wasn’t something I needed to worry about, but at the top edge of the Sprinter van there is a considerable curve that you need to account for or else you will lose substantial cabinet space.
For me getting the right angle on the upper cabinets required a lot of patience and numerous cardboard templates.

The method that I found worked best for me was to do my best to eyeball the rough angle I needed and cut that shape out of cardboard to make the template quite a bit larger than I knew was going to require. After I had the rough shape cut out of the cardboard I taped a black sharpie marker to the edge of a 6-inch stick. Using one hand I held the cardboard into place and with the other hand, I used the stick to trace the outline of the wall onto my template piece.
Once you have the correct angle cut out of the cardboard you can trace out a new template and with a little bit of trial and error, you should have an angle that works for most areas in the van.
You are going to find that the angle doesn’t work perfectly in each and every position, but I just made the template as close as possible and used the same angle for all upper cabinets. I think if I would have tried to find the perfect angle for each cabinet I would still be sitting in the van scratching my head

If you look at my upper cabinets they are actually made up of 5 different sections and before hanging them in the van I mounted the 4 passenger side cabinets together and hung them as one and mounted the 2 drivers side cabinets together and mounted them as one.


Some people are probably asking why would you make your cabinets in so many different sections…. Well, the answer to that has a few parts.
A) With my limited knowledge, it seemed like the easiest way to accomplish the task
B) The side of the lumber limited my ability to make them much larger.
C) Since I didn’t have a garage to work in I needed to keep the cabinets in a size that allowed me to pack them in and out of the van easily.
It’s not Perfect
You can see in this image the side profile of the upper cabinets once they were hung the angle is not perfect… But it’s close enough and with a quick faceplate to tidy things up, I think it looks perfect.


Mounting the Upper Cabinets
After building the upper cabinets it was time to get them mounted in place. Before mounting them inside the van I fastened them together outside of the van as 1 unit for each side and then brought them into the van.


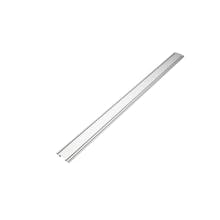
For the bottom edge of the upper cabinets, I purchased an 8ft section of angle aluminum from Home Depot, and using larger self-tapping screws fastened the angle piece through the wood strapping into the metal bracing of the vehicle.

Bringing the cabinets into the van was a definite two-person job and as one person held the large 8+ ft cabinet in place the other person fastened the cabinets through the top from inside the cabinet into the wood strapping that was installed going across the ceiling of the van.

Finally having the cabinets installed in the van was a huge milestone to achieve in the build process. Just the fact that I no longer had to move things in and out of the van every time I wanted to work on it made everything seem to move much much faster. Also being able to utilize the cabinets and storage for tools and materials during the build greatly cleaned up the work area and made things seem a lot more efficient and productive.
Building the Wardrobe Unit
Now that that the majority of the cabinets were built and installed in the van it was time to build the biggest piece of furniture in the van…. The wardrobe unit. For many people, the unit that I chose to build is much bigger than they would use in their van, but since living in the van in a variety of different climates it has been really nice to have enough clothing to comfortably live in all of the different weather conditions.


This is by far the largest piece of furniture in the van, but to simplify the construction of the unit I broke it down into two smaller items.
Item #1 – Drawers and Shoe Storage
The bottom section of the unit consists of 2 drawers and shoe storage. I use the top drawer for clothing storage and the second drawer is just used for general storage in the van. Then you will notice on the very bottom of the unit I have 3 compartments that I can either place shoes in or baskets to store more items.

Item #2 – The Upper Hanging Section
For the top section of the unit, I built this unit as a very basic hanging closet. The unit was fairly easy to build and then the only difficult part was templating the side panels so they followed the curve of the vehicle. When doing this cardboard and patience are your friend, it is important that the unit snugs up nice and close to the wall otherwise when it comes time to fasten it in place you will have issues.
Building the Shower
Finally, the last cabinet that needed to be built…. I like to call this one the show stopper… ha. This is by far the one part of the van that impresses people the most in the entire van. When it came to planning the bathroom part of the van I really wanted to have an indoor shower and toilet without taking up too much space in the van and I think I have accomplished that with this design.
By the time you get to this point in your cabinet-making-journey, this cabinet piece becomes child’s play….

Ok, now that you have all the cabinets built you really are only 75% done the cabinets.

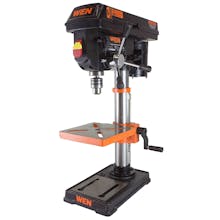
The real fun starts when it’s time to fasten and mount all the drawers fronts and hinges. Luckily for this process (and a lot of other aspects of the van), I had my Dad helping with it. So this job took half as long as it would have had I of been doing it all on my own. For this part of the job depending on the style of hinges you use having a drill press is going to come in extremely handy.
Pro Tips
Kickplate / Toe Kick
Due to a pure lack of knowledge when it comes to cabinet building I forgot / didn’t even think of installed a toe kick under the cabinets. For those of you who don’t know what a toe kick is it is a piece of wood that raises the cabinets off the ground a few inches. This allows you to stand at the counter without hitting your toes on the cabinet door. It also makes it so the cabinet doors don’t hit the ground as they swing open and closed…. On my build you can see I forgot to add this feature so I needed to shim the cabinets slightly. It hasn’t been a big deal but if I were building things again I would make sure to include this.

Templating
When doing the cabinets inside the van it’s not enough to measure twice and cut once….templates are required for a ton of the work to fit properly. Take your time and make high quality templates, at first they will seem like they are taking way more time and effort but trust me in the end they end up saving you time and endless frustrations.
Making Drawers Work
This build was the first time that I had ever built anything with drawers. One thing to note is just I recommend making your drawers openings rounded to the nearest ½ inch as it will make creating the drawers easier. Every drawer slider you purchase will have a required clearance in order to make it properly work. So if the opening is 28 inches and the drawer slides require ¼ inch of clearance that means your drawer needs to be made at 27.5 inches for it to properly function, because that ¼ inch is for each side of the unit.
So take into account all the necessary drawer clearances required for the drawers to work and make the drawers accordingly.

One other issue that you might run into is that your drawers fit in the space but as you open and close them they bind and don’t close smoothly at all. This is typically caused when the opening isn’t perfectly square and the easiest way to remedy this issue is to determine where you issue is and create some small shim pieces to adjust the drawer slider to create a smooth in and out action.
Painting and Sanding
Building the cabinets was only half the battle… The painting, staining and sanding is what really seemed to take forever. Because I was working on the cabinet portion of the project in the fall it was really hard to find days that I could paint the cabinets.

For the white part of of the cabinets I have at least 3 coats of paint sometimes 5 on every visible surface with a thorough sanding in between each coat. Then when it comes to the dark stained areas they all have 1 coat of stain and then 3-5 coats of polyurethane satin finish on them. Then on top of this all the insides of the cabinets that were not painted white such as the drawer boxes received 3 coats of clear incase anything spilled inside them.
Painting the cabinets took a ton of work to get a nice finish and at times I really dreaded the hours plus of sanding in between coats. But with my Dad’s help I am sure glad we put in the effort because the quality of finish on all exposed surfaces was well worth the effort.
Having the wood shop make cuts
When you are at the lumber store purchasing your large sheets it will save you a ton of time if you can have the lumber yard make some of the cuts for you. Most lumber yard have a large table saw which does much straighter cuts than most people can do at home. Often times when placing a large enough lumber order they will include a certain number of fee cuts and then the rest are usually done at a small fee.
Obviously I didn’t have the lumber yard do every cut for me, but if I knew when I was picking up lumber than I needed a bunch of pieces ripped down to a certain length I would have them handle that for me.
In and Out / In and Out
The most annoying part of the cabinets was not having a garage to work on them or store them in. Each and every time I wanted to work on them I had to pull everything out of the van and then at the end of the day pack it all in, then if the cabinets weren’t dry from a painting day I had to haul everything down the stairs into my parents basement letting them dry overnight.

If possible I would highly recommend convincing a friend or family member to let you take over the garage for this part of the build because it will save you tons of time on your build process.
Mounting the cabinets coming out of square
Once it is time to mount the cabinets in place be careful. I made the mistake of getting everything working perfectly outside of the van (drawers and doors) and then when I placed them inside the van and screwed everything in place I pulled everything out of square and none of the doors or drawers were working properly. So my quick tip especially when fastening the cabinets to the one beside the other you might need to shim things to avoid this problem.
Two Depth Upper Cabinet
Something I decided to do on the upper cabinets was to make them two different depths. The cabinets over the counter spaces are much shallower than the rest of the cabinets to allow for more headspace when cooking.

If I were to do things over I think I would have made the larger back cabinets even a bit wider because you don’t really need to worry as much about the headspace over the kitchen / bed area.
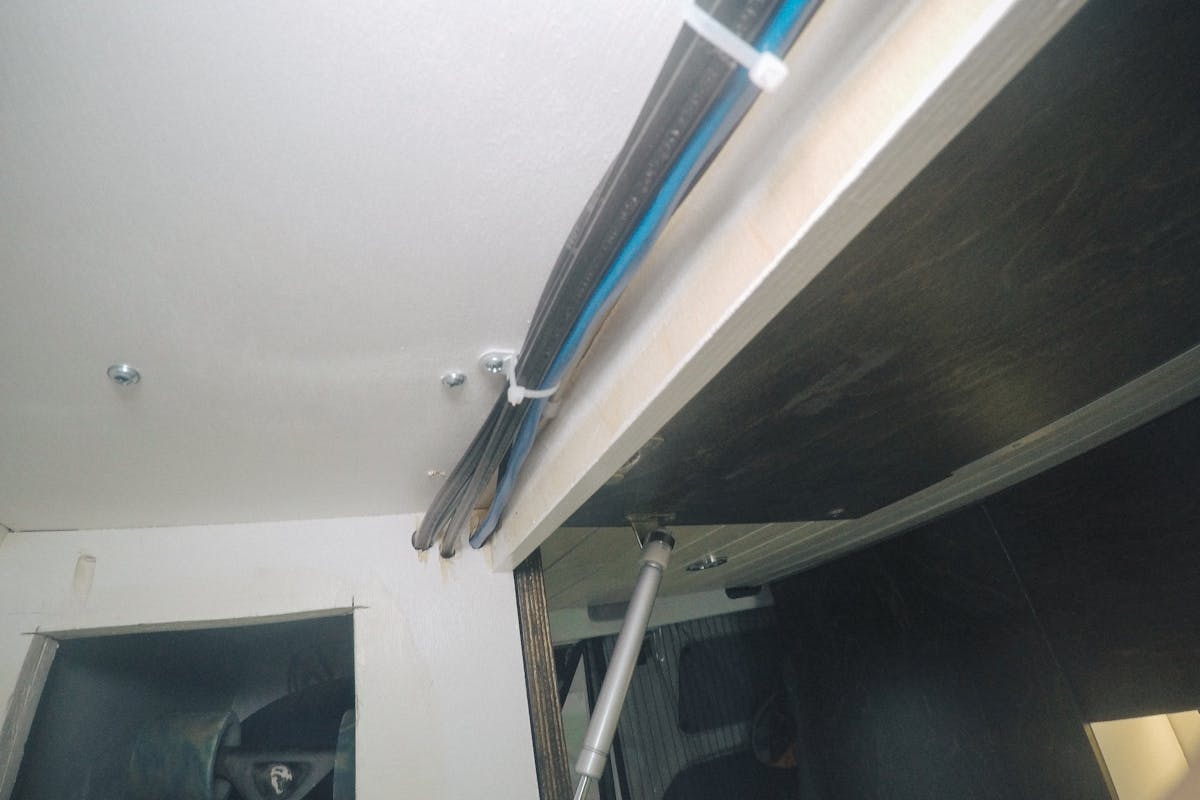
Upper rail to hide wires
When building your Van you aren’t going to think of everything and you aren’t going to have time to put everything you want in the van during phase 1. Even if you think you have thought of everything you will forget some stuff and find things you want to add.
The hardest things to add into the van are any electrical components that you didn’t plan for if you don’t have enough wire run. Luckily with my cabinet design I was able to sneak in some additional wires and not have them obvious in the interior of the van.
Additional Items After Phase 1
- Backup Camera
- Interior Router
- Exterior Antenna
- Exterior Rack Lighting
Big Enough Benches
The biggest thing I wish I would have done right the first time was building the benches big enough. You really don’t need that much room between the benches to be able to walk through and having benches that aren’t big enough are super annoying. Luckily I was able to fix mine with a pretty simple addition and didn’t have to remake the cushions, but it would have been nice to make it the right size the first time and then I would have been able to make the overall boxes bigger increases the storage in them.
My biggest mistake when making the benches was I didn’t account for the 4 inches of foam on the back and bottom when testing out the comfort level.


Bottom Units Perfectly Square
As I built the bottom counter units I didn’t worry about the curve of the van and built them with square backs. It saved a ton of time and hasn’t affected anything in the van.
Working in Winter
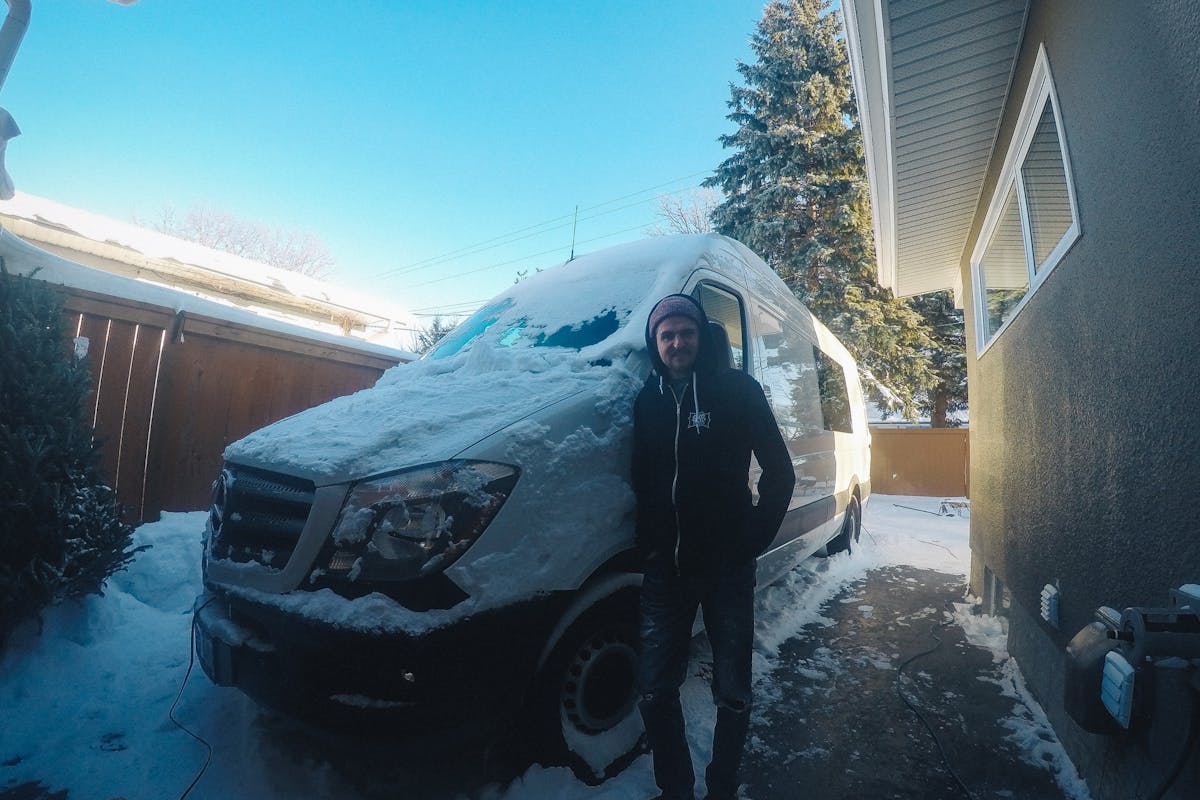
If you have been following along you will know that this build I thought was going to take 3 months… well that didn’t happen. So just based on the timing of when I got the van I wasn’t able to start till late fall and before I knew it I was working on the van in the middle of winter….outside…. Lots of snow…..
I highly recommend doing everything you can to eliminate having to work in the winter outside because productivity is almost non existent and I often had days I would put the heater on the van for a couple hours and then make the decision….. Nope Im not feeling it today and just shut the heater off and go back inside.
Having the Right Tools
When doing your research on how to build out your own custom camper van, you will find endless amounts of information on the internet discussing how anything is possible and anyone can accomplish this task. While this might be true I want to give you some full disclosure on building out the van and especially doing the cabinetry work.
Yes, I had never completed a project like this ever… nothing even close and Yes, I was able to achieve some pretty amazing results for my first time.
But all of the research in the entire world doesn’t even come close to replacing have the right tools for the job.


On this project I was lucky enough to have access to thousands and thousands of dollars in tools that many people will not have access to. I know with my current skill level completed this part of the project would not have been possible without these tools.
So even though I agree that anyone if they do enough research and spend enough time can accomplish this, I don’t think without the right tools it would be possible to complete a quality job.
Gallery
VIEW ALL


Author
Scott Adamson
Vanlife aficionado with his rescue dog Ellie. We travel around North America in search of good times and fresh coffee.