Summary
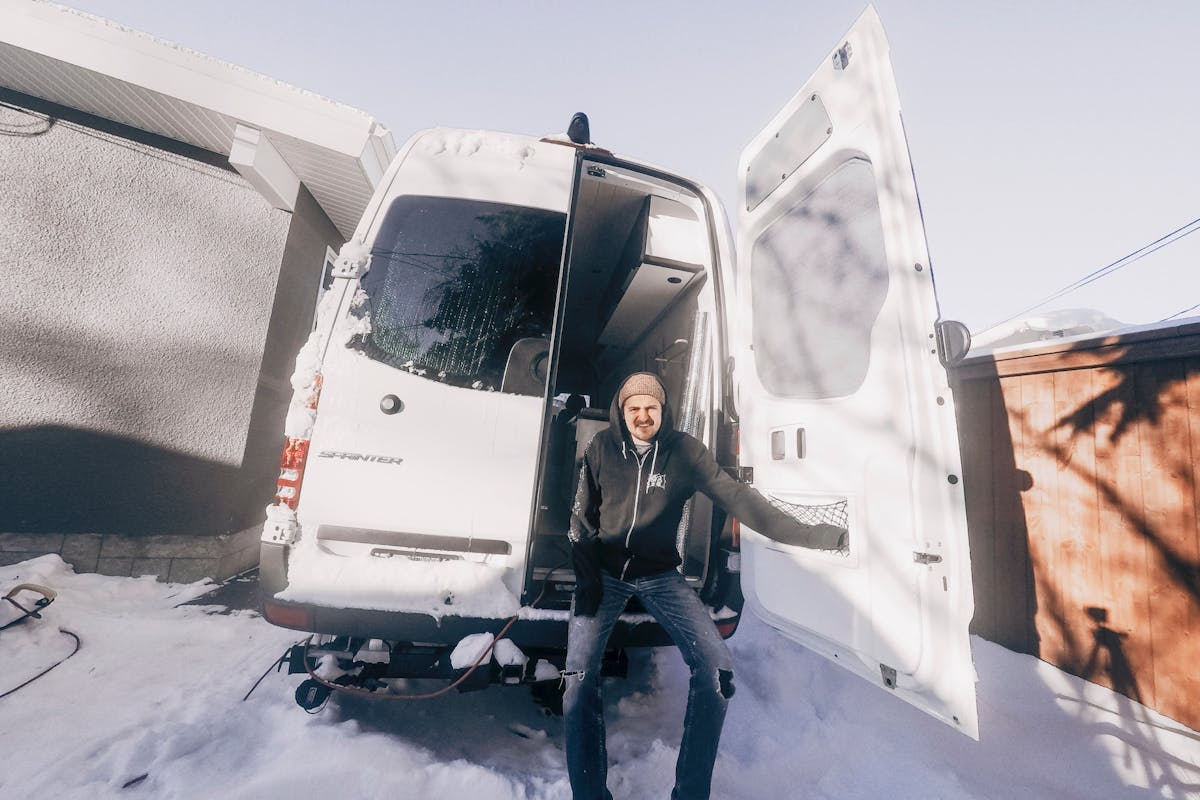
This is, by far, one of my favorite things in the van.
When planning out a van build, many people overlook the idea of having a heater in their van. Most people look at the expense associated with the heater and choose to toss it on the wish-list instead of the must-have list.
I’m here to tell you that having a heater in the van has been essential for the type of van life I am living. Not only have I spent nights at -30c and had the van at a comfortable 17-20c inside, but even when traveling along the coast of California during the winter, it was so nice to be able to turn the heater on as some nights the temperature would drop to 8-12c.
I know a lot of people will consider it a luxury they just don’t need in their van. While that might be true for you, I personally love having the option to chase the snow and live in a colder climate from time to time, knowing I have the heater to rely on.
During my actual van build, the heater was an essential tool for me. Since I didn’t have a garage to work in and the fact that the build took twice as long as I had predicted, I ended up needing the heater just to keep me warm throughout the build.
Since spending a significant amount of time in my van, I can confidently say that the Espar heater has become one of the favorite purchases. Using the heater makes it feel more like an integrated system that doesn’t require any effort or thought. When I want to use it, I just push the magic button.
Heater Selection
I had decided to use a diesel heater very early in the planning process. This decision was mainly because I wanted to have a single fuel source on the van, other than the solar, and didn’t want to have to carry around additional propane to run a heater.
Once I decided to use a Diesel Heater, I needed to decide which company and model would best suit my needs. For a long time, I had planned on using a Rixens heating system for my hot water and was leaning towards the D4 but after deciding to go an alternate route with my hot water system I decided that the D2 would be just fine for what I was going to use the heater for.
I was familiar with the Espar brands from a previous diesel truck that I had, so I did very limited research on other options. If you do take a look around you will see that Espar seems to be the most popular choice in the sprinter forums.


Tools used
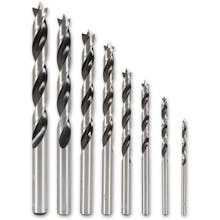

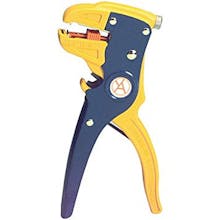
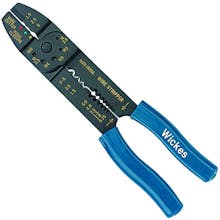
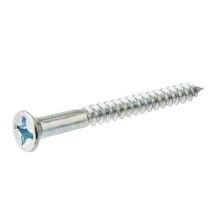
I used self tapping screws to fasten the 1x4 strapping to the metal frame on the vehicle. I found that some of the screws I tried weren't that great, and it was easier to pre-drill the holes before using the self tapping screws.
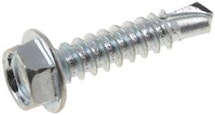
In my build I used a ton of different sizes and lengths of screws depending on what application I was using it for.
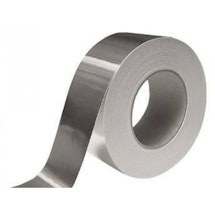
Foil tape was used on the floor of the van once I laid the sheets of Polyiso board to seal off the seams. I probably could have used any construction tape here, but I went with the Metal Foil tape because I was using foil backed insulation.Overall lifespan of foil tape is far greater than most other alternatives that could have been used. Also, foil tapes are known for having extreme temperature versatility which makes it a great option for a product being used in an all season conversion.
I had made the decision to use a diesel heater very early in the planning process. This decision was mainly because I wanted to have a single fuel source on the van, other than the solar, and didn’t want to have to carry around additional propane to run a heater.
Install Process
This is a DIY project
For the majority of people installing an Espar heater, this is a DIY project that can definitely be tackled. By completing the installation yourself, you can save yourself 1-2 thousand dollars that can be used elsewhere in your project.
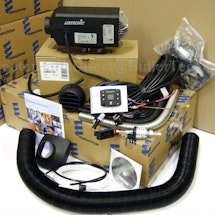
Opening the box to the Espar heater for the first time can be a bit overwhelming. Just take a step back to plan out the install, figure out how the system works and go through each piece with care.
The Espar is a fairly simple design. Once you get a fundamental understanding of how the heater works, installing the unit it just a matter of putting all the pieces together.
Connections you’ll need to hook up
You’ll quickly realize that the installation instructions were written with a professional mechanic in mind. They assume you know what you are doing…
In it’s simplest form, the Espar Heater has a few main components:
1. Fuel source
This is done by installing a secondary fuel pump in the diesel tank that will pump the diesel from the tank to the actual heating unit.
2. Fresh air intake
This is the cold air from the outside of the vehicle that is pushed through the heater and then pushed into the vehicle as warm air.
3. Warm air output
This is where the warm air from the heater unit exits the heater and enters the vehicle.
4. Heater exhaust
This is the exhaust after the combustion has taken place to create the heat and this is exited outside of the van vehicle just like a muffler on a car.
Here is a quick description of the components that come with your Espar heater and what their function is.
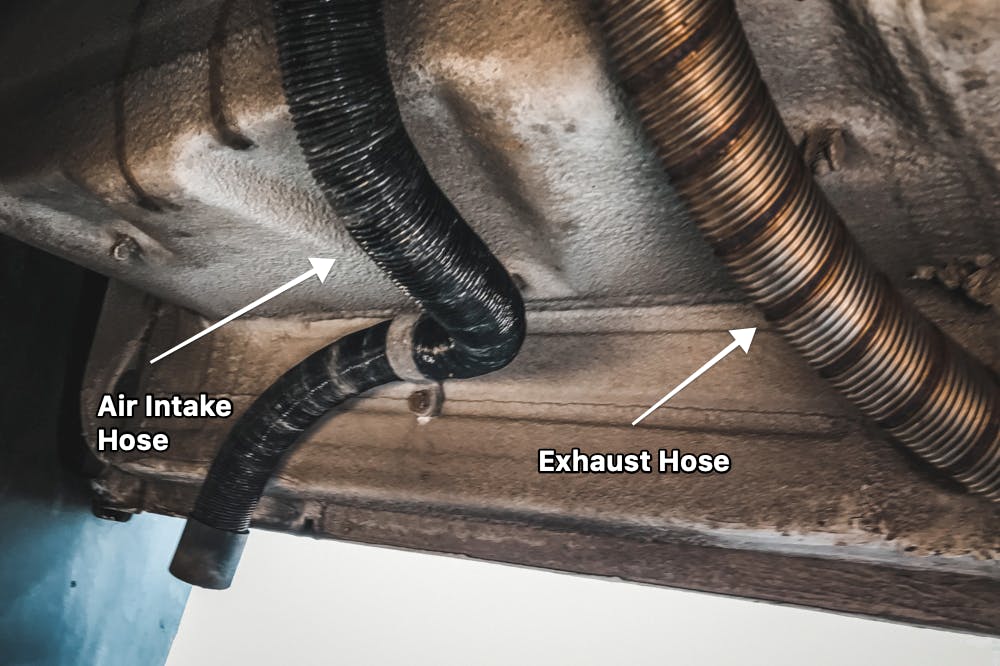
Intake air hose
This is the black flexible hose provided with the unit.
Exhaust air hose from combustion to the outside of the vehicle
Silver, heat-resistant ribbed metal hose provided with the unit.
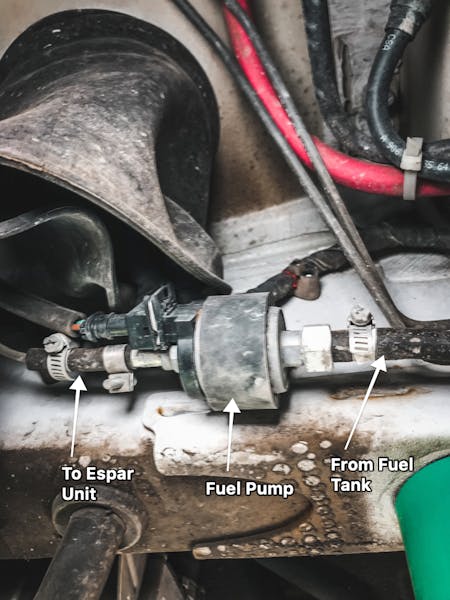
Fuel line from the main diesel tank
Under the van, routed through the fuel pump that comes with the heater.
Thermostat control wiring
This stays internal to the van. Just follow the color-coded instructions on the wiring, it’s straight-forward.
Power wiring
I ran this directly into a fuse in my 12v panel that is located under the back bench.
Intake/Heating air ducts
I installed my heater under the passenger seat which was the route that many people decided to go in the sprinter forums.
Install process
Here is how I went about installing the heater in my 2016 Sprinter (same as 2008-2016).
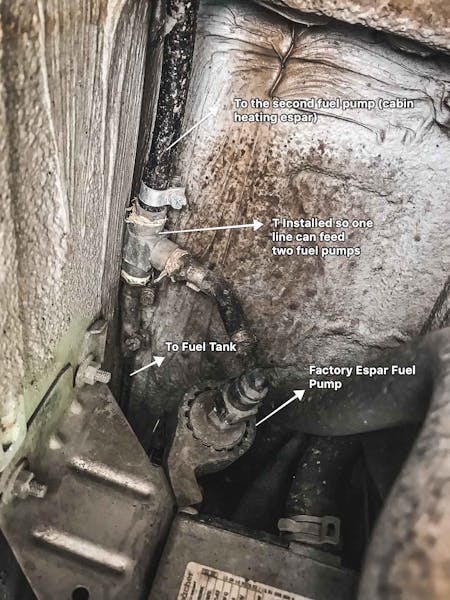
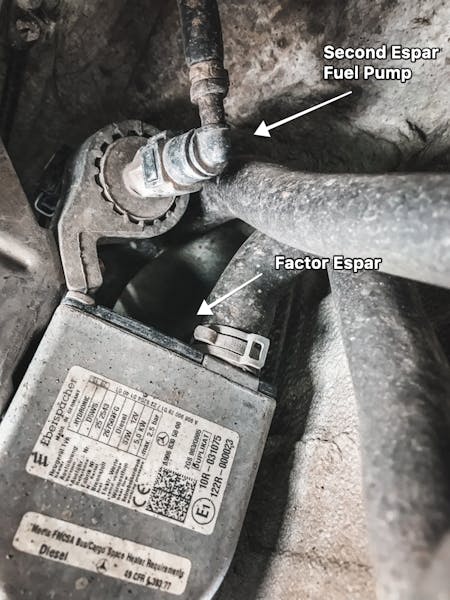
Please note this is the same process as 2007 and earlier models except that you’ll need to drop the fuel tank and install the fuel pickup that the Espar D2 or D4 heaters come with. Luckily with my van being a 2016 Sprinter Van and also having a factory Espar D2 already installed all of the piping into the existing fuel tank was completed for me.
The only thing I need to do when it came to routing the fuel was to install the second fuel pump and insert a T in the existing line so I could feed the factory fuel pump and the newly installed pump.
Determining where you want the heater
1. Taking off the seat
Figure out where your heater is going to go and measure all wires, ductwork, and fuel lines to make sure you have enough material. For my build I decided that I was going to put the heater under the passenger seat. This location was recommended by many other sprinter van owners.

To take the seat off, you’ll need to remove 4 bolts from the base as well as the seat belt bolt in the seat.
Once all of these bolts are removed, the seat comes off pretty easy but don’t forget about the wires under the seat for the airbags. Heated seats will also need to be disconnected before you can fully remove the seat from the vehicle.
I read somewhere on the interweb that when you have the airbag wires disconnected you should avoid starting the vehicle. If you choose to start the vehicle with the airbag wires disconnected it might cause a check engine light to show up on the dash which would require taking it into the dealer to have it reset. I personally didn’t feel like testing out this theory so I’m just passing along the info as an FYI.

Another quick tip is that once you remove the seat, store it in a safe place outside of the van. If you leave the seat in the van, you’ll be tempted to sit on it which will crack the plastic around the bottom edge that isn’t designed to be load bearing and support your weight…
Yup…. I broke mine.


Now that you have the chair removed from the vehicle you can get a better idea of how the heater is going to be positioned inside the space and properly measure all of the wiring provided.
2. Prep work
For me the the hardest part of the entire Espar heater install was just mapping out all the fittings and adapters I would need to install the fuel pump for the Espar heater. The easiest thing to do is just crawl under the vehicle and see what’s going on and how much slack you have in the existing hoses on the van.
Newer model sprinter vans will have an area for the second pickup so you just need to tap into that.
My install was a bit different because my van had the winter package which meant that it came with a factory D2 already installed. I needed to splice into the other D2 fuel pump. Yes that’s right… My van has two D2 Units and 2 Espar Fuel pumps…. I know it’s stupid but the factory D2 Units come with a bunch of factory settings that you can’t override, making them impossible to use as a cabin heater in a DIY van project. Hence why I needed to install the second heater.
Once the fuel pump was installed it was time to start the prep work required under the seat to actually install the heating unit.
The first step was to start mapping out the actual mounting of the heater unit under the passenger seat. In order to mount the heater I used a block of extra plywood from the van cabinets to make a base that was used to fasten the espar mounting bracket.


Once you have the area mapped out and you have a rough idea of where the block is going to be placed for mounting you can drill the holes required.
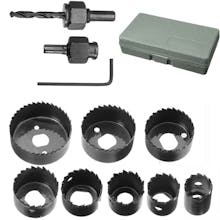
You are going to need to drill 3 holes total. One for the intake, one for exhaust and then one for the fuel line which is a very small hole. To drill the two larger holes I used a hole saw and for the fuel line hole a regular drill bit does the job. There is a template provided with the heater that makes this easy.
File down sharp edges on the holes and install heat-resistant muffler putty on the wood. I also folded up some aluminum foil and lined the inside of the wood just to reflect some heat back. Probably overkill, but it was easy enough.

3. Mounting the espar
Now that you have all the necessary holes drilled in the floor and the wood block is in place to mount the Espar heater, it’s time to start putting the lego pieces together.
To start, you’re going to want to attach the intake, exhaust and fuel line to the heater before mounting it in place.


After the lines have been clamped in place you can then feed them down through the holes in the floor to the underside of the vehicle. When doing this, make sure that you have the heater orientation correct… The silver exhaust hose will be towards the back of the van while the black intake exhaust hose will face to the front. With the Espar heater the hot air will blow out from exhaust side of the heater so just double check that you have done this correctly.
4. Running the wires
Once you’ve mounted the heater in place on the block of wood under the seat, you can start to run all of the control wires for the thermostat and fuel pump. At first glance, the wiring diagram that comes with the heater seems complicated but after reading through it a few times it’s actually well laid out.
For my van I have the house batteries as 12v fuse panel located in the rear passenger bench seat so I need to run the control wiring to that point. The easiest way I found to do this was to remove the sliding door step and run the wires under that area to the back of the vehicle as seen below.


Once you have all the wires run and the little Espar Control panel mounted to wherever you plan to have the control mounted you can quickly hook up power to the unit and make sure that it has power going to it.
Once you have the power wires connected and you plug in the control panel / thermostat the lights should turn on.
At this point I didn’t try having the heater fully fire up and proceeded with finishing the install of the heater.
5. Drill heater vent hole
The last part of the install that needed to be completed before I tested out the heater was to drill the hole in the bottom of the chair to allow somewhere for the hot air from the heater to enter the vehicle.
With the heater mounted in place you’re going to want to measure as accurately as possible where the center of your hole needs to be in the chair. Keep in mind the large flexible hose that comes with the kit is used to connect the two pieces together so you have a little bit of room for error here.
Once you’ve drilled the hole in the base of the passenger seat using a hole saw you can then finish by mounting the nice vent cover provided with the kit.
Once that is done, the last thing needed on the install is to cut an appropriate length of the black flexible tubing and use the provided hose clamps to connect everything together.


6. Mounting the exhaust and intake vents
The final step before starting the heater is to properly fasten the intake and exhaust hoses under the vehicle with the provided hose clips. When under your Sprinter you will see at the very bottom edge of the van there is a ~1 inch lip in the body. This is where I fastened the intake and exhaust hoses. According to the Espar manual, one thing to keep in mind is that you will want to have these two hoses at least 3 ft apart to avoid the intake hose sucking in the exhaust fumes and bringing them back inside the vehicle.
Pro Tips
Selecting the heater
When looking at putting a heater in your van you have a few different options. The first thing you need to decide is whether you are going to use a propane or a diesel heater. I think that the propane heaters are less expensive but my main reason for choosing the diesel heater was because I didn’t want to have to store the propane in or outside of the van.
After you’ve made the decision to go with a diesel heater you can then select what model is right for you.
In the Espar line up of cabin Airtronic (air) heaters you have the D2 and the D4. I opted to go with the D2 and in the 170 van it has been a good choice, that being said sometimes when its really really cold out (and we are talking -30c) the heater does have a hard time getting the warm air all the way to the back of the van, which is where my bed is.
So my solution for this was to make an extension piece using the leftover black flexible hose that pushes the air more towards the back of the vehicle which works fine for me.
Heater placement
After spending lots of time reading various forums on the internet, it seemed like a lot of people put them under the passenger seat so I decided to go with the same option.
It made the install fairly simple and I didn’t have to dedicate other storage space in the van to housing the heater.
If you move the heater further back in a 170 van you might not require the extension piece on the super cold days…
But I’m going to assume that most people won’t be using their vans in -30c that often so it’s probably not a real issue.
Starting it the first time
The first time you go to start the heater… It’s probably not going to start.
And you will be frustrated because the control unit will start throwing error codes. I think the error code that you get is a No Flame Detected error.
Don’t panic. This is not an issue with your heater. The issue is that the fuel pump hasn’t pumped fuel all the way from the tank to the heater so it cannot ignite. All you need to do is restart the heater and try and try again till it fires up. I think I had to run the heater about 7 times before it ignited.
If you’re getting impatient and worried about the heater being faulty you can actually crawl under the vehicle and watch the fuel in the clear fuel line making its way to the heater.
As soon as the fuel reaches the heater it should start to fire up. Keep in mind it might take one more cycling to purge all the air from the fuel line and then you should be ready to rock n roll.
Winter diesel
The Espar will not work with regular diesel in the winter months. The fuel becomes too thick and can freeze inside the thin fuel line on the way to the heater, making it a bit of nightmare to sort out.
With my build what happened is that I installed the heater in the fall and since I was never driving the van I didn’t need to put fuel in the vehicle so by default the van was full of Summer Diesel which caused the fuel to thicken up and freeze inside the fuel line.
I had to crawl under the van in the winter using a heat gun and carefully warm up the fuel line over and over to get the fuel flowing again.
A simple way to prevent this is to ensure that you have winter diesel in the vehicle and add a little bit of diesel conditioner to each tank and you won’t have any issues with the heater.
Error when low un fuel
If you try to run the Espar heater on less than ¼ tank or something very close to empty (basically anytime the gas light is on or close to being on) the Espar heater will not turn on.
What is happening here is that, by design, the fuel tap in the diesel tank that is feeding the Espar fuel pump doesn’t go all the way to the bottom of the tank so it stops you from being able to run the vehicle out of fuel while using the heater. So this is a feature but something you need to keep in mind if you plan on using the heater. If you try to run the heater in this setting you will get the error No Flame Detect because no fuel is getting to the heater.
Another tip is that if you haven’t run the heater for a while you might get the No Flame Detect error as the fuel as siphoned its way back to the fuel tank and requires a couple cycles to fire up again.
Install a CO detector
If you are going to use a diesel heater in your van I highly recommend installing a CO (Carbon Monoxide) detector…..
It’s just smart. Obviously if you have everything installed properly you shouldn’t be getting any CO inside the vehicle but things can break, crack, or shift and you want to make sure you and everyone inside the vehicle is safe at night or whenever you are running the heater.
Gallery
VIEW ALL


Author
Scott Adamson
Vanlife aficionado with his rescue dog Ellie. We travel around North America in search of good times and fresh coffee.