Summary
Time to install the walls and ceiling panels on your sprinter van (i.e. time to start covering up the mess you’ve created!).
If I’m being honest
Up until this point, the van looks really chaotic. It’s not until you start covering up the walls does it start to look like you’re getting closer to the finish line.
When choosing your interior wall and ceiling coverings, it’s important to look at all available options and consider the look and feel you’re going for. This part of the project is a really fun part, and goes a long way to define how the entire van will look in the end.
Personally, I wanted the van to feel as big as possible, so I decided to use bright colors in order to achieve this really clean beach vibe.


Tools used


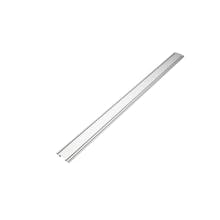

For the strapping on my vehicle I just used standard 1x4 pine that came in 8ft lengths. At Home Depot I was able to buy a bundle of strapping and that more or less was enough for the entire vehicle. I found that by using a 1x4, it was thin enough that I was able to get it to bend in most places to follow the curvature of the van but also strong enough that I would properly fasten it to the vehicle and hang the finished materials to it.
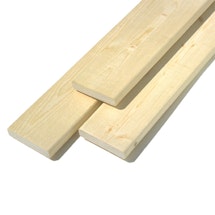
Strapping
For the finished wall panels on the van I decided to go with ACP (Aluminum Composite Panel). ACP is a type of flat panel that consists of two thin aluminium sheets bonded to a non-aluminium core. ACP is used within the signage industry as an alternative to heavier, more expensive substrates. ACP is also used for external and internal architectural cladding or partitions, false ceilings, machine coverings, container construction etc.
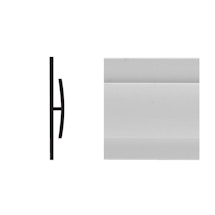
Because the ACP board comes in 4x8 sheets, I was going to have a couple of seams in the vehicle. In order to cover those seams I picked up from FRP Molding from Home Depot and used that to hide the joints, creating a nice finished look inside the van.
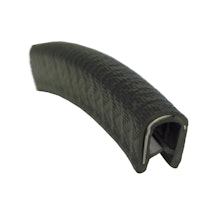
When installing the ACP on the vans walls, you're going to have some cut edges. To hide the edges, I purchased some automotive trim and covered all the cut edges using it to create a finished look everywhere.
For the strapping on my vehicle I just used standard 1x4 pine that came in 8ft lengths. At Home Depot I was able to buy a bundle of strapping and that more or less was enough for the entire vehicle. I found that by using a 1x4, it was thin enough that I was able to get it to bend in most places to follow the curvature of the van but also strong enough that I would properly fasten it to the vehicle and hang the finished materials to it.
Strapping
For the ceiling on the van I went with a 1/4 pine tongue and groove plank. This was the thinnest wood material I could find, and it gave me the desired look that I was going for.
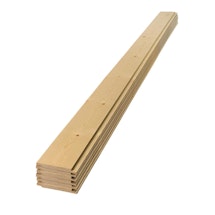
Pine Plank
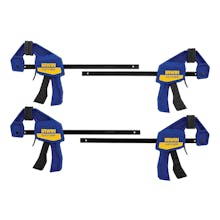
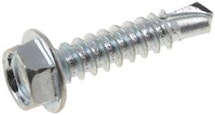
I used self tapping screws to fasten the 1x4 strapping to the metal frame on the vehicle. I found that some of the screws I tried weren't that great, and it was easier to pre-drill the holes before using the self tapping screws.
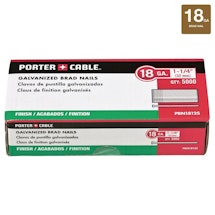
When I was putting up the ceiling planks I used brad nails that were about 1/2 inch to ¾ just for tacking the planks in place while the construction adhesive dried.
For the ceiling panels of the van I knew I wanted to use a wood planking but I also wanted to tie in the white cabinets and wall panels. I decided to use a white semi transparent stain to give the wood a white washed look and allow the wood grain to still show through.
Anywhere in the van that I wanted to leave the wood grain exposed, I used a stain as the color treatment then applied multiple coats of clear satin or matte Varethane to give it a durable professional finish.
Clear Coat
Install Process
Walls
Once I finished the insulation in the walls and ceiling, it was time to start installing the ceiling and wall paneling.
My van came with some chloroplast wall panels from the factory, so rather than throw them away I decided to re-install them on the lower sections of the van that I wasn’t going to cover with the ACP. They were ultimately going to be covered by cabinets once the build was finished.


Next, it was time to install the 1×4 strapping all over the vehicle. Installing the strapping is quite easy on the ceiling. Just follow the existing ribs in the sprinter ceiling and cover them with the 1×4. Once these straps are installed it will also hold in all of the ceiling insulation.

The strapping on the walls take a little bit more planning to figure out. Be sure to plan out the where the ACP will start and finish to ensure you have strapping on all the seams and that it can be properly fastened. Also make sure you have the strapping installed in enough places that you’ll be able to securely fasten all cabinets and shelving within the van.
My advice when installed the strapping in the van is that more is always better and you won’t regret having more than needed. This will allow you some flexibility to change your mind as you build out the interior of the van.

After the strapping is installed, you can start putting up the ACP on the walls. I only used 4 sheets of ACP, which on a 170 Sprinter, was only enough to cover any exposed walls.
You can see what I mean in the photos below…. This made the installation easier and also reduced the costs a bit as I would have needed 2 more sheets to completely cover everything in the van, which I found unnecessary.


To install the ACP on the walls, I used a round white head screw that was fastened into the strapping behind.
Between the seams of the ACP, I used an FRP Joint from Home Depot to give the interior as seamless a look as possible.

There are a few places where you have to leave an exposed cut edge in the ACP. I used an automotive trim, installed with a heat gun, alongside the kitchen window and rear doors. This gave everything a nice and finished look.

Using the ACP as an interior surface was really easy to install. ACP also came with a high gloss finish, eliminating the need to paint. It also provided me with an easy to clean surface that won’t stain. The panels are also thin enough that they’re quite flexible, allowing them to follow the contour of the van quite nicely without any force.
Due to the size of the panels (4ft x 8ft), having two people can really help. One person can hold the panel in place while the other person quickly puts in a few screws.
One other thing to note about installing the wall panels is that it’s super important to create templates before cutting out the actual panels. I was able to use the existing chloroplast panels the van came with to get a rough idea of the shape around the back doors and trace that onto the cardboard template before test fitting it in the van.


Ceiling
I wanted to go with a wooden plank look for the van ceiling. Originally I was going to use standard tongue and groove cedar boards, but I was a little worried about the thickness and weight on the ceiling. I decided to use a 1/4 inch tongue and groove pine plank. This material is very thin (to help maintain headroom) and lightweight to increase the ease of installation.
When I bought the pine planks I knew I wanted to apply some sort of finish on them but I wasn’t quite sure what. After doing some research I decided to use a White Semi Transparent stain which gave the wood a white washed / pickled look that tied the ceiling in nicely with the white ACP on the walls and the white cabinetry.
For the pine planking I did 2 coats of the white stain and then sanded each plank before applying 3 coats of clear varathane to clear coat the panels.


Once the stain and varathane had dried, it was time to install the planks on the ceiling. Keep in mind I installed the ceiling after I had hung the upper cabinets, reducing the amount of planks required overall. The planks in my van are held up with construction adhesive and 3/4” brad nails to tack the planks in place while the construction adhesive dried.
Since install, the van has hit well over 50,000 miles. Things have held up great!
Pro Tips
Keep the ACP covered
When you get your ACP, you’ll notice that it comes with a protective film on either side. I left this film on during the entire build to help protect the thin aluminum painted finished. By keeping this protective film on the wall covering I was also able to trace out some lines and map out my screw holes to make sure everything was nicely spaced out.

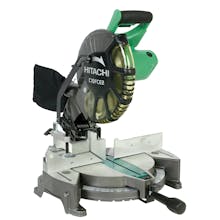
Cuts easily with a jig saw
To get some nice cleans cuts on the ACP use a jigsaw. The material cuts very easy and with a fine tooth metal blade in the saw you will be left with a nice edge. Due to the fact that the wall covering is aluminum I did file the cut edges a bit once the cut was completed just to remove any bur left by the saw.

Use a cardboard template
Because I chose to only install the wall panel where it was going to be visible, the amount of templating that I had to do was minimal. The only section that required some templating was the back edge along the rear doors. If you purchased a new cargo van it should have come with some chloroplast pieces that I just removed and traced onto cardboard to get the pattern correct.

Make sure you use the right side
If you are using ACP for your wall panels you will notice the white panels come with two finished sides. Side 1 is gloss and Side 2 is a matte finish, so when tracing your back edge cuts make sure you are tracing it on the right side…. Learn from me… the one good thing is that the two colors are so close (gloss vs matte) that you would never notice in my van that the drivers side is different than the passenger’s side.
Map out the spacing
Before you begin installing your ceiling planks, take some time to pull a few measurements and make sure that you don’t end up with a sliver of material as you reach the edges. For the best results, start from the middle and work your way to the edges. Before you start you need to figure out if you’re going to have a seam along the mid line of the ceiling or if the mid line will fall in the middle of a plank.
Don’t force it
The planks that I selected for the ceiling were tongue and groove. Since they were only a 1/4”, when I tried to use force to get the planks together I broke off a few of the joints. Since the ceiling of the vehicle is curved, like everything else in the van it’s not straight. Installing a tongue and groove product has its challenges in getting everything to fit nice and tight so just take your time and be patient. When I first looked at this part of the project I thought it would take me a few hours to install….. fast forward 2 days later.
Use a drop cloth
I used a heavy duty construction adhesive to hold the panels in place and just brad nailed them in place to help hold them while the glue dried. This technique worked really well but be careful as sometimes you think a piece is, “stuck,” in place and as you turn around to grab something you hear the plank hitting the van floor smearing sticky glue everywhere. So I highly recommend using a drop cloth for this part of the project to avoid getting glue all over everything.
Leave the edges out for wiring
When I installed the ceiling planks I didn’t install the last piece on either side which left me just enough room to fish the wires for the ceiling lights.


Gallery
VIEW ALL


Author
Scott Adamson
Vanlife aficionado with his rescue dog Ellie. We travel around North America in search of good times and fresh coffee.