Summary
The topic of plumbing in the van is one of the most complex / robust topics when doing a van conversion. As with most of my build I did leave many things out of the build, so with my plumbing there are a lot of things you could do without if you wanted but for me and my version of van life I deemed them as essential parts of the build.


Tools used


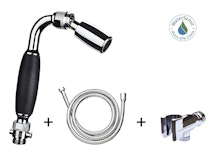
I wanted to use a low flow shower head on the van, that didn’t feel like a low flow shower head. So I went with the 1.5 GPM North Sierra Shower Head.
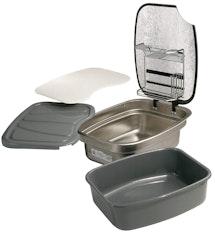
The sink I selected for the van was the SpinFLo Kitchen center. The sink has been great in the van and I really like having the lid option. I haven't used all the other accessories such as the drain pan, cutting board and wash tub, mainly because with the sink rack on the lid you can’t close the lid with those items inside.
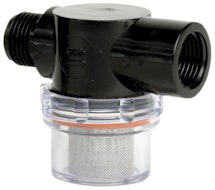
This another add on for the ShurFlo pump that I used in my Van Build and what this does is provide more instantaneous water pressure when you go to use the tap. Without this you might experience a lag in water pressure until the pump catches up.
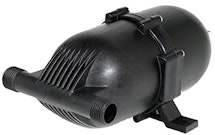
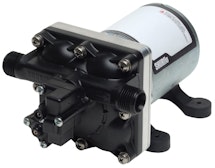
I went with the 12v ShurFlo 3GPM Water Pump. This unit seems to be a very popular option with the conversion community and so far its been great. I opted to include the small screen filter to protect the pump from any sediment passing through and also the accumulator tanks
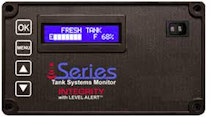
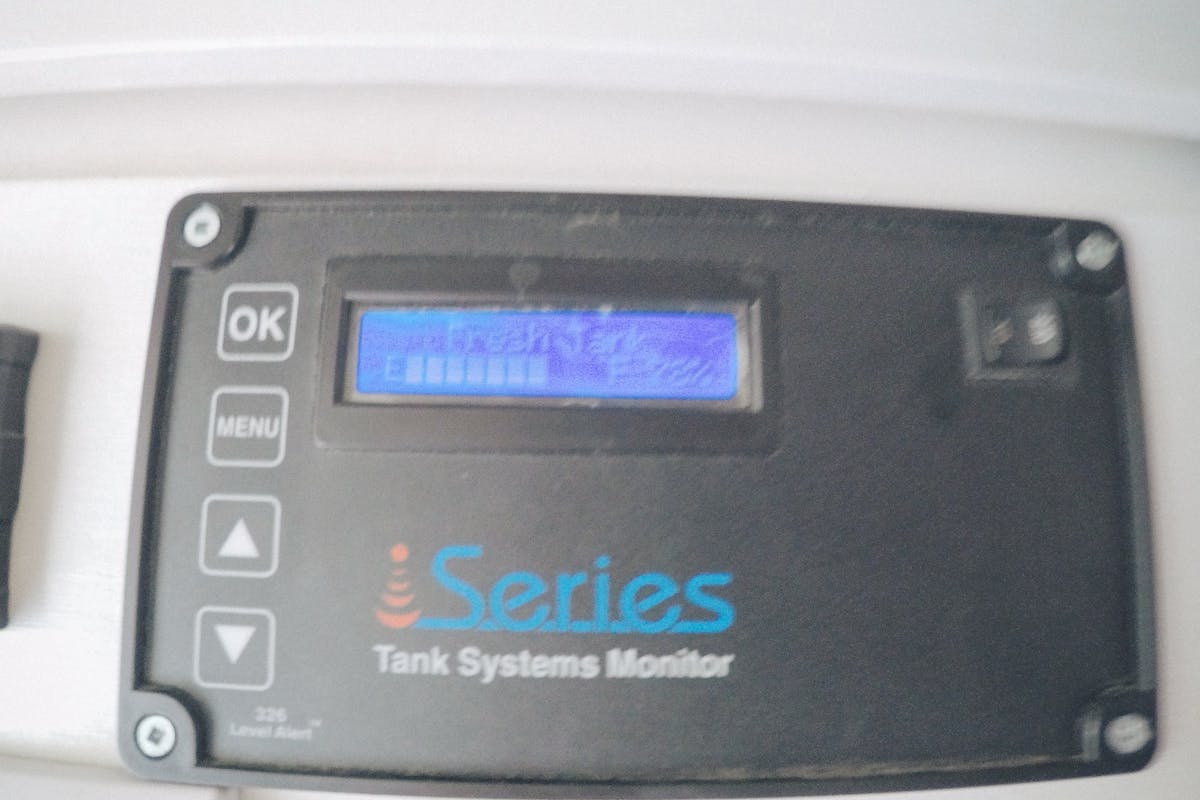
Installing a tank meter on your system is not essential and probably an unnecessary expense for lots of people. But with the iSeries system it’s easy to install and save me having to crawl under the van to see the tank levels and from finding out that I'm out of water when it stops coming out of the tap.
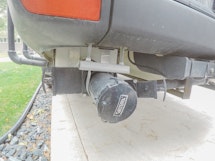
For dumping my greywater and blackwater tanks I wanted this process to be as simple as possible. So after doing a lot of research it seemed like the Valterra Knife Valve System was the most common. They make a model that can be used for a greywater and blackwater system as it has both a 1.5inch opening for the Greywater and 3 inch opening for the Blackwater.
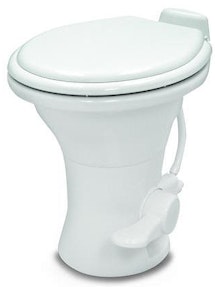
Having a flush toilet after doing my research seemed to be the best option. I looked around at toilets and all of them see to have their pros and cons. After making the decision to use a Flush Toilet the RV Toilet from Dometic seemed to be by far the most common choice.
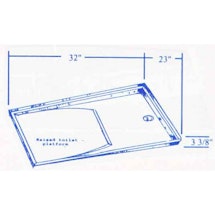
Due to the fact that space is so limited in the van I merged the toilet and shower area together. In order to do this I purchased a shower pan and toilet combo that allowed me to do this. The shower area isn't large but it does work well and no water doesn’t go all over the van when showering.
If you go with the ShurFlo water pump then you will want to get the strainer filter that goes on the intake side of the pump. This will help eliminate and large sediment from entering into the pump and potentially causing damage.
For more information on the water filter system I used check below as I went it to greater detail.
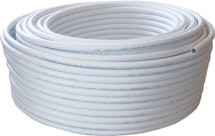
The majority of the build is done using PEX Pipe because its really easy to work with.
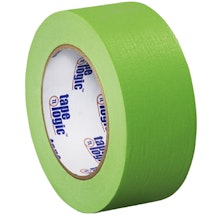
When doing any plumbing work I’m sure the need will come up for some Teflon Tape.
When working with ABS Pipe you will need to use ABS Glue or Cement to fuse different sections together. I used a Oatey Medium Body Cement that is designed for non pressurized fittings up to 6 inches, as my largest connection is 3 inches for all the black water fittings.
Used in the installation of drain pipes, sinks, and valves, plumber's putty will ensure a watertight seal. Providing that the putty is softened before use, it's incredibly flexible and pliant texture enables plumbers or DIY enthusiasts to apply the putty relatively easily
ABS Pipe is the black plumbing pipe that you see at the hardwear store. In my build ABS Pipe was used in all the drains. So from the Sink to the Greywater, Shower to Greywater, Toilet to Blackwater and as well to connect the Greywater and Blackwater tanks to the Dump Valve.
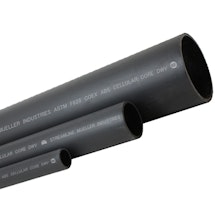
ABS Pipe
In a few areas on the van where the plumbing piping is exposed / on the interior wall. I elected to use copper piping just purely for its appearance. The copper piping is less forgiving to work with and takes some skill to properly install and solder all joints together.
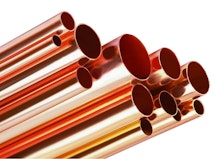
Copper Pipe
Install Process
Tanks
With my build, I decided that I wanted to have 3 tanks under the vehicle. For my build, I was going to have a Fresh Water, Greywater, and Blackwater Tank on the van. A lot of people will determine that they don’t require a black water tank and will opt to use one of the various non-flush options. For me personally, the RV Toilet made by Dometic was the best version for how I had imagined my life in the van.
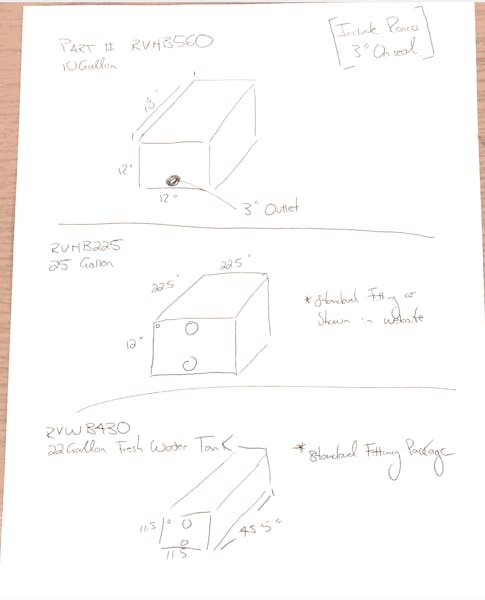
Fresh Water Tank 22 Gallons
Grey Water Tank 25 Gallons
Black Water Tank 10 Gallons
The links above are the actual tanks that I used in my conversion and the top photo is the fitting arrangement that I ordered my tanks with.
Mounting the Tanks
For my van, I followed the advice of many other people that had completed van conversions. I made the decision that I was going to mount all of my water tanks under the vehicle. Some people decide to keep the tanks inside the vehicle to avoid potential problems with freezing if you are choosing to use the van a lot in the winter.
After spending some time in the van I’ve made the decision that I don’t regret my decision to keep the tanks under the vehicle but I do plan on adding a small greywater and fresh water tank inside the van at some point for the winter trips I go on. This is will allow me to quickly blow out the exterior plumbing lines and drain those tanks and switch the pump to draw water from the tanks mounted inside the vehicle. For these interior tanks, I will probably just do something like a 5 Gallon Fresh and 5 Gallon Grey Water tank that can easily be removed from the van to fill and dump them when required.
Mounting Location / Hardware
When mounting the tanks under the van I wasn’t sure exactly how I was going to mount the tanks in place and have them be secure enough when traveling down the road or off the road…
What I ended up doing was having some pieces of flat aluminum diamond plate bent into 90-degree brackets and then using a flat bar across the bottom with a bolt-on either side to secure the tanks in place and so far this has worked well for 2 of the 3 tanks….
You see with the grey water tank I didn’t take into account the ground clearance out the back when going over steep approaches and when traveling I bottomed out the tank and bent all of the aluminum brackets. So for the grey water tank, I had to have a steel bracket made which not acts not only as a tank mount but also of a skid plate to protect the tank in case of another bottom out…which has happened and the tank remains all good. One thing I do plan on reworking is the grey water tank as there was no reason why I couldn’t have pushed the grey water tank ahead almost 5 inches which would have eliminated this entire problem which is something that I think I am going to do in the near future. FYI I will have to purchase a new tank as I will not be able to reuse this one and might select a tank this is 2 inches less deep but I’ll update this if I go that route.


Tank Fittings / Setup
Once I had figured out where and how I was going to mount the tank it was time to start putting the puzzle pieces together and I’ll do my best to break that down here for you.
Let’s start at the Fresh Water tank and work our way through the system. not sure exactly how I can write this in a way that is easy to follow and understand but I’m going to give it a shot and see what happens.
Filling the Fresh Water
So starting with the Freshwater tank we need a way to fill the tank with our freshwater. When doing this part of the van build you have two things to consider. For me filling my water tank is a very simple process of just connecting a garden hose to the inlet on the freshwater tank. On my van on the water inlet fill section I also installed a valve that allows me to direct the water past the tank and directly into the van in case I am ever at a campsite that has RV water connections. It’s a pretty easy feature to add to the van build so I did it but that a heads up after all my travels in the van I have yet to hook up to an RV water connection so this feature has never been used and I don’t see it being used any time in the near future.


In the van, I also wanted a way that I would fill up the fresh water tank from a lake, or river. So what I did to make this possible was purchase a second water pump and mount it on a piece of leftover plywood and using a small lithium battery and garden hoses I can place the pump by the water and pump fresh water into the van that is up to 150ft away from the van. Based on the fact that to date I have spent most of my time on the coast and around saltwater I haven’t used this feature a ton to date (2-3 times) but since I do plan of spending the next 6 months or so inland and around freshwater lakes, I think it will come into play a lot more frequently.
This system is part of the reason that my Grey water tanks are larger than my Freshwater tank, my thinking was that in the freshwater tank probably about 60-70% of the water the shower and sink actually enter the grey water tank and the remainder of the freshwater is consumed or dumped on the ground when showering outside, so this size grey water tank I can get 2 Freshwater fills to every time I need to dump the greywater.
Fresh Water Usage
After the freshwater has been filled into the tank it is pumped from the freshwater tank into the van using a 12v Shurflo Water Pump with the 12v water pump I also purchased the strainer that is recommended and the small accumulator tank which allows for instant pressure from the taps making it operate and feel similar to a house tap this pump pressurizes the system in the van to around 45 – 50 PSI before the pressure shut off valve kicks in.
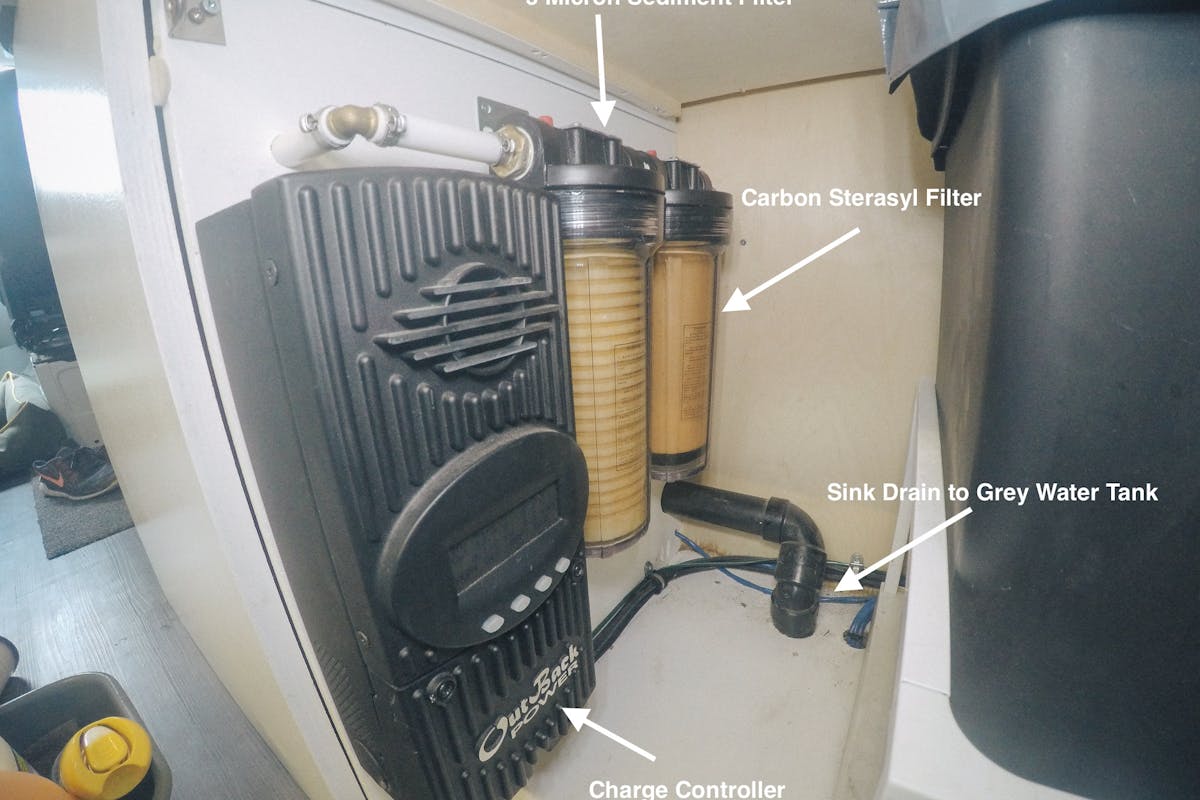
Water Filters
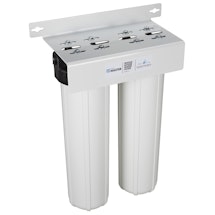
In my van, I knew that it was important to have the ability to drink the water from the freshwater tanks. I didn’t want to have to worry about always worrying about the quality of the drinking water and whether or not I was going to get sick…. And I can confidently say to date I have drunk gallons of water that without being filtered likely would have had some adverse health effects. In my water system I use a 2 / 3 stage water filter system, what do I mean by 2 / 3? Well, when I’m filling up water using my secondary water filter out of a lake or river I use a larger sediment filter before the water makes its way to the 2 stage filter system that is permanently mounted inside of them. The filters that are mounted in the van include 1 sediment filter and 1 carbon Sterasyl filter which I believe is the equivalent of a .5 micron filter.
Selecting Your Filters
When it comes to figuring out what filters you want to use in your van it can be a fairly daunting task. There is just so much information on the internet on this topic and it seems like there are endless types and sizes you can select from. Take it from me if you just copy the exact setup that I have above you should be covered for most situations in North America.
The first thing you need to figure out is what size of filters that you are going to use in your system as that will determine the housing size you are going to purchase. For my system I used the standard 10inch housing as the filters for that size of canister seemed to be most popular and the easiest to find filters for.
Types of Filters
Sediment Filters
For my first two filters (1 in the van used all the time and 1 in the secondary pump only used when filling up water from a lake or other similar source) used in the van, they are sediment filters and they are designed to do just that….they remove sediment from your water. These filters come in a ton of different models
- Pleated
- String Wound
- Polyspun
All of these filters arse similarly priced and do the same job. In my van, I use Polyspun filters because I was told that they do last slightly longer than the other available options so because the cost between all of them was so similar I opted to go with the Polyspun filters.
Focus more on getting the correct micron rating for your application and don’t worry about which of these types you’re getting.
All of them work well for dirt, sediment, and rust; none will improve taste, remove chlorine, or filter bacteria or other microorganisms.
Carbon / Ceramic Filters
The last filter stage in my system is the Carbon Block Filter and for my van, I went with the Doulton W9220406 Imperial Sterasyl OBE Ceramic Filter. Carbon Filters in my opinion are the most important part of the water filter system I am using as they are what filter out the “bad” stuff and bacteria. Same as with the Sediment Filters they are many different types of Carob Filters and unlike the sediment filters, each type seems to perform a slightly different function.
Carbon Wrapped Filter
These filters are generally the cheapest of the carbon filters. They are also the type of carbon filter that is easiest to find. If you are simply seeking to improve the taste of your water, most will work fine. However, it’s important to note that they REDUCE the chlorine in the water, they do not totally eliminate it
Granulated Charcoal Filter
The big thing to know about granulated charcoal filters is that they do little to filter sediment from the water. Further, they do not come in fine enough filtering to remove giardia. They are easy to identify as they have a solid plastic outer casing.
Carbon Block Filter
Only the finest 0.5-micron carbon block filters will remove giardia and cryptosporidium, both of which can cause severe diarrhea. The 0.5-micron carbon block filter is also virtually 100% effective in removing chlorine
For more information on Water Filters, I would suggest going online and doing some research but be careful as it can be a bit of a black hole and I found that most people, mainly manufacturers aren’t that willing help you because of the fact they cannot confidently comment on the quality of water you will be filtering to provide the best system for you. So because of this, you need to just do your homework and find a system that you are comfortable with.
Fresh Water Usage
After the water leaves my 2 main filters inside of the van it is fed to my faucet, hot water tank, shower, and toilet.
Tank Meter
With the three-tank system that I am using in the van, I wanted some way other than crawling under the van that I could tell the rough levels of the tanks. After doing some research I found the iSeries Tank Monitor system, based on my limited knowledge of electrical and plumbing this seemed like the easiest system to install on the tanks I had purchased as it required no drilling and mounting sensors inside the tanks. All measurements are taken from the outside of the tank.
Toilet

This topic can be debated for years on the sprinter forums… to install a toilet or not to install a toilet… Well, I’m full time in the van and using the toilet every single day sometimes more than once, so not having a toilet was never an option. I also opted for a flush toilet and a large black water tank as I wanted to be able to go a couple of weeks without having to worry about emptying or dealing with the black water. I know that installing a flush tank with a separate black water holding tank is more work but for me, it was and continues to be worth it. Other options of toilet such as a separator toilet, compost toilet, or cassette toilet all required me to get a little too close to the business a lot more frequently than I was after. In my opinion, those toilet options are more of emergency toilet options and less viable for everyday use. But again this is just my opinion.
Shower
A lot of people when they stop and look inside the van and at first glance have no idea that I have a shower inside and when I unveil the secret shower cabinet it 100% has the highest shock factor. Opening up the shower just based purely on everyone’s reaction is my favorite thing to show people in the van.

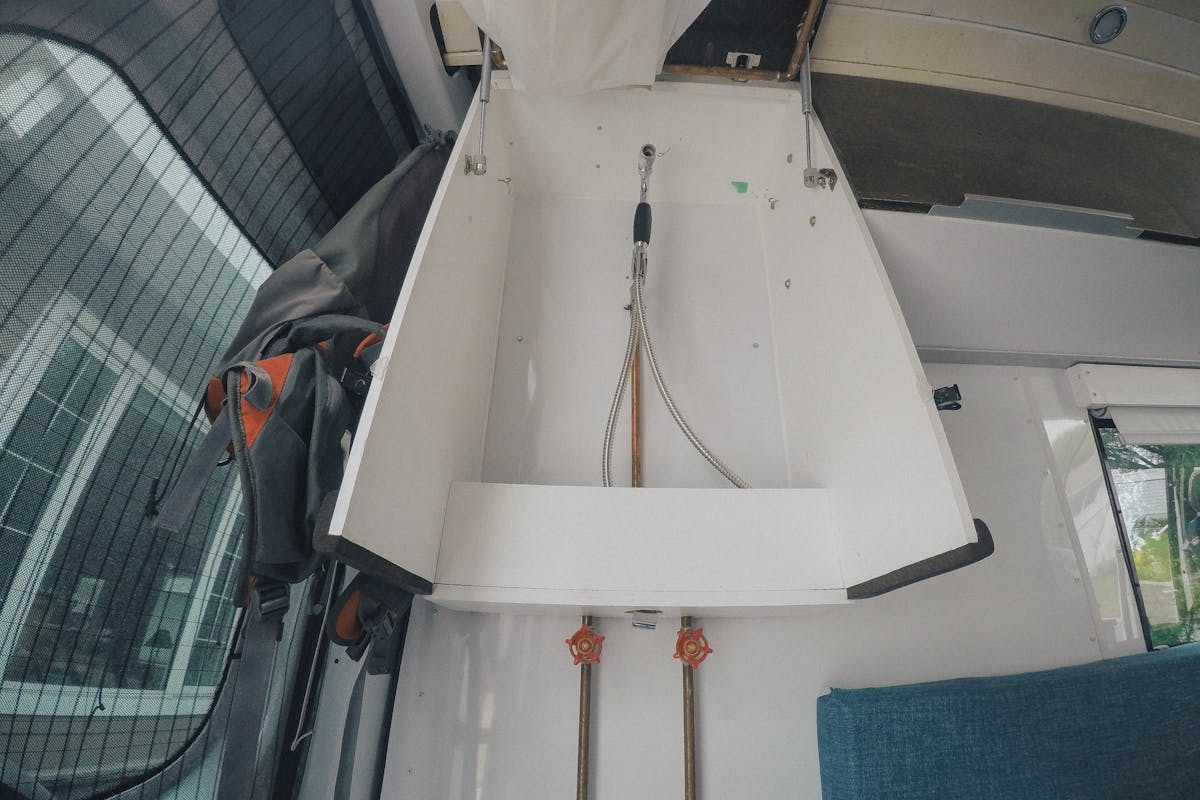
I haven’t seen this style of shower anywhere else, so I think my van shower may be pretty unique. When designing it, I knew I wanted to be able to shower inside the van when necessary and also have the ability to pull the hose out of the van to rinse off outside.
Because inside the van space is limited, I decided to go with a Toilet / Shower Pan Combination.
A top priority in vanlife is to conserve water, so I looked for the highest-quality low flow shower head I could find. I decided to go with the High Sierra Low Flow Shower Head that is 1.5 GPM. After using many low flow showerheads in the past, this is by far the best one that I have used because it feels like a regular shower. The main difference with this shower head is that I can have a full (quick) shower by turning the water on and off in about a minute using only 1.5 gallons of water out of my 22.5-gallon tank.
You may notice that I used copper pipes in a few areas of the van. SPOILER ALERT I didn’t use copper everywhere. The majority of the van uses PEX. I only used copper in the areas where the pipe is exposed because I think it looks cool.
Sink
When picking a sink for you van lots of people want to use ceramic sinks or large kitchen style sinks in the van. A few things to consider in making this decision are that the items inside the van are going to be moving around…. So select a sink material that can withstand the constant banging and jarring of a moving vehicle…. I know that the porcelain white farm style sink is going to look great in the reveal photos but after 1,000 miles on gravel roads, it might not look that good in the photos of you picking up the pieces off the floor. FYI if you are looking for that style of sink, there are other composite material options that will withstand the stresses of being in an RV.

Another thing to consider is the size of the sink…. A large sink just means that it is going to require a lot more water to fill the sink to rinse and wash dishes.
So for my build, I decided to use the SpinFlo Kitchen Center
I liked it because of the folding glass lid that allows you to close the sink and increase the counter space when required, it’s also nice when I haven’t done the dishes and I can just fold down the glass lid and pretend like they are all clean and put away….
Pro Tips
Hot Water Tank
When living in your van you are going want hot water occasionally… whether it’s for doing the dishes or enjoying a nice hot shower it going to come in handy. For my van since I have a relatively large solar system installed I wanted to take full advantage of all the power being made during the day and decided that I could get away with using a point of use 12 gallon 110v hot water tank
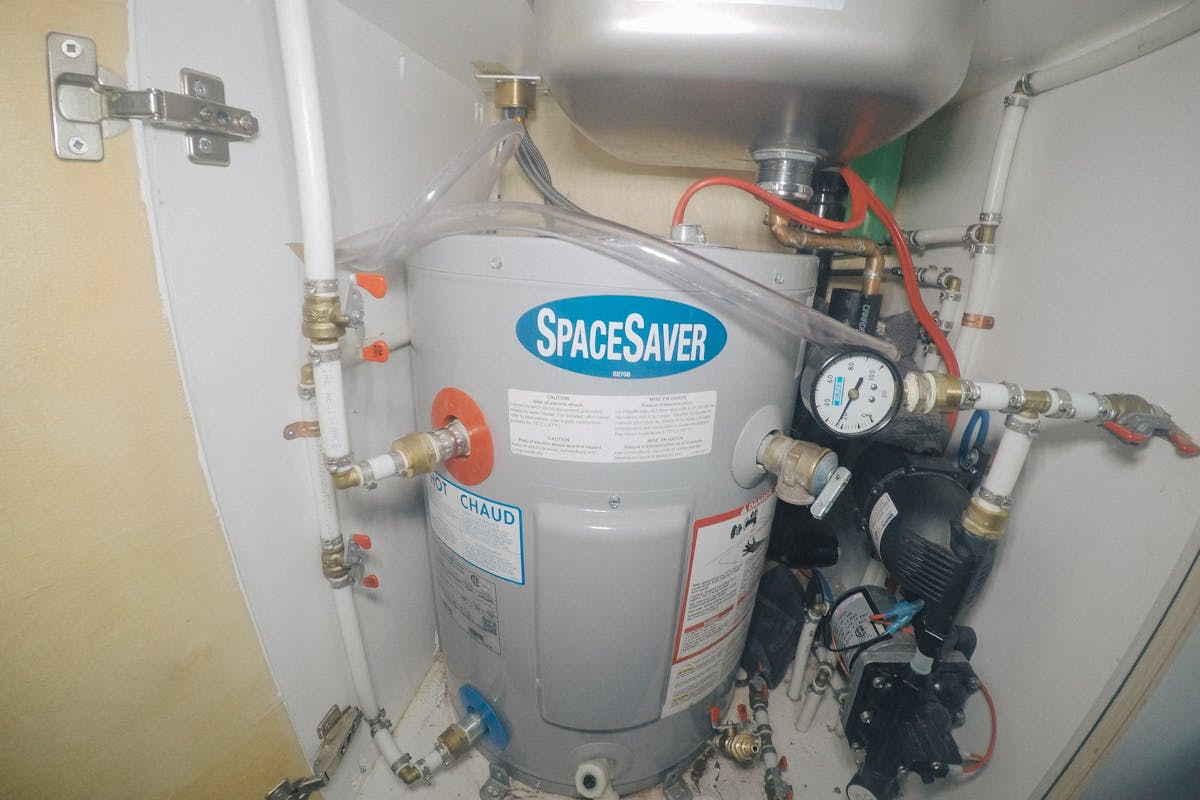
The system I used is designed in such a way that while the vehicle is driving and the house batteries are fully charged it will dump the excess power into creating hot water so with the amount of driving I do I typically always have hot or at least very warm water. Also the charge controller that I used on my solar setup has an AUX load option which I have the hot water connected to using a solid state relay, so as my house batteries exit the bulk charging state and enter into the absorb charging state the relay will begin to pulse sending excess power to the hot water tank, then after the absorb charging state has passed and the charge controller enters the float stage even more excess power is then sent to the hot water tank. So with my system between bright sunny days and ample driving I always seem to have enough hot water to take a shower and keep the dishes clean.
Water Filter Reduce Flow Rate
When planning out your water system in the van you have many things that you need to consider in order to conserve water. One thing that can be be often overlooked is the flow rate of the entire system, starting with the pump you use your system will only be able to create so much pressure, which is then impeded further by the water filters being used. In the van every drop of water can matter at times so understanding the limitations and how you entire system will function will only serve to benefit you down the road.
Proximity to the Rear
Where I am from and completed the build out on my van everything is flat. So worrying about the tank clearance under the vehicle was something I completely overlooked. I mean I overlooked it until I got to California and entered my first steep entrance way and ripped apart half the plumbing under the van as the van bottomed out. Let me tell you this noise and the feeling in your stomach almost makes you sick…. When mounting your tanks in the back especially is they are located behind the rear axles make sure you push everything as close to the front of the vehicle as possible. In my build I had almost a full 5 inches that everything could have been moved forward but because I never even thought of it I didn’t take the time to do it and now it’s something that I am ordering a new greywater and blackwater tank so I can make this adjustment.
Keep in mind now that I was aware of my clearance issues I learned how to drive the van and how to assess different approaches to reduce the amount of times this was an issue, but if I had planned ahead I wouldn’t have had this problem at all. Also to help this situation I did have the Van Compass 2” Lift System installed on the van which helped a lot with the ground clearance and the overall ride of the van.
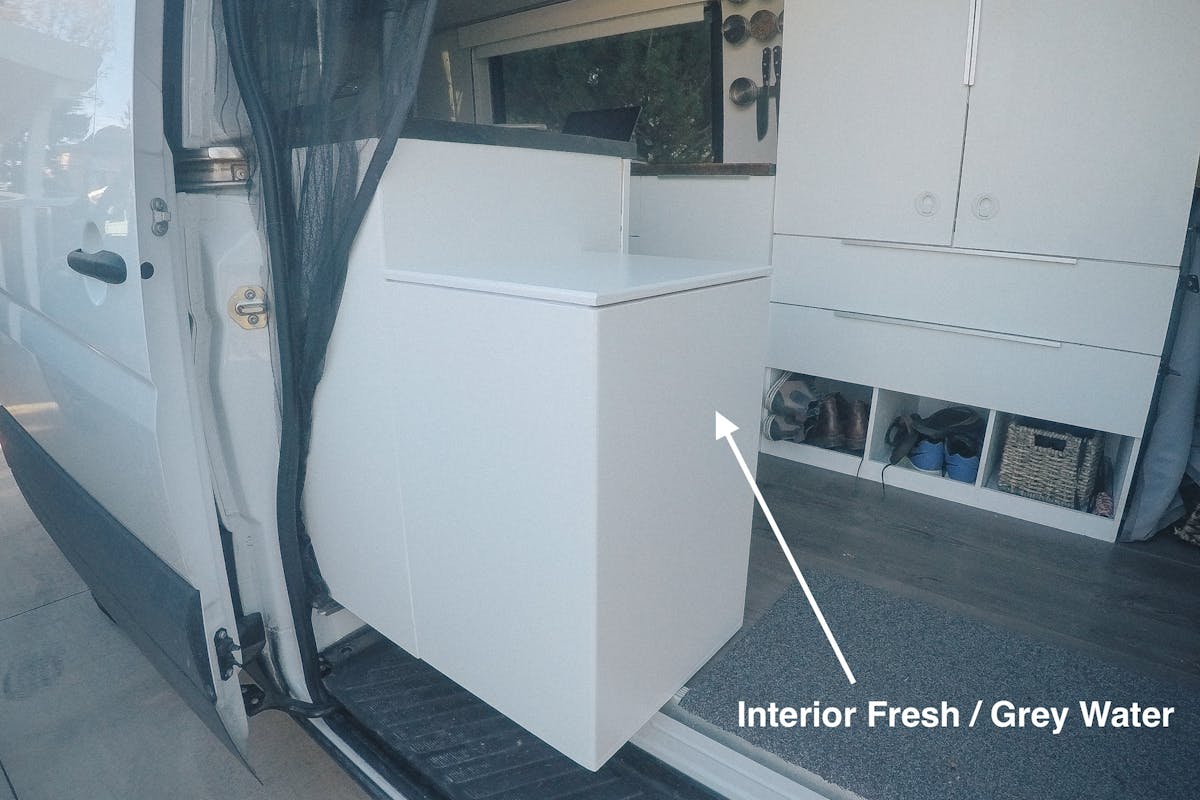
Putting a smaller interior Fresh Tank
Initially, I had all my tanks mounted under the van, which I certainly don’t regret. But after being on the road for a while, I found myself spending a lot of time in winter climates to go snowboarding. I needed to find way to get water inside the van to avoid freezing. I did a quick easy fix and just used (2) 6-gallon jugs beside the sink. 1 is for Fresh Water and the other is for the Grey water. It’s a quick easy fix that has worked really well for any winter traveling that I do.
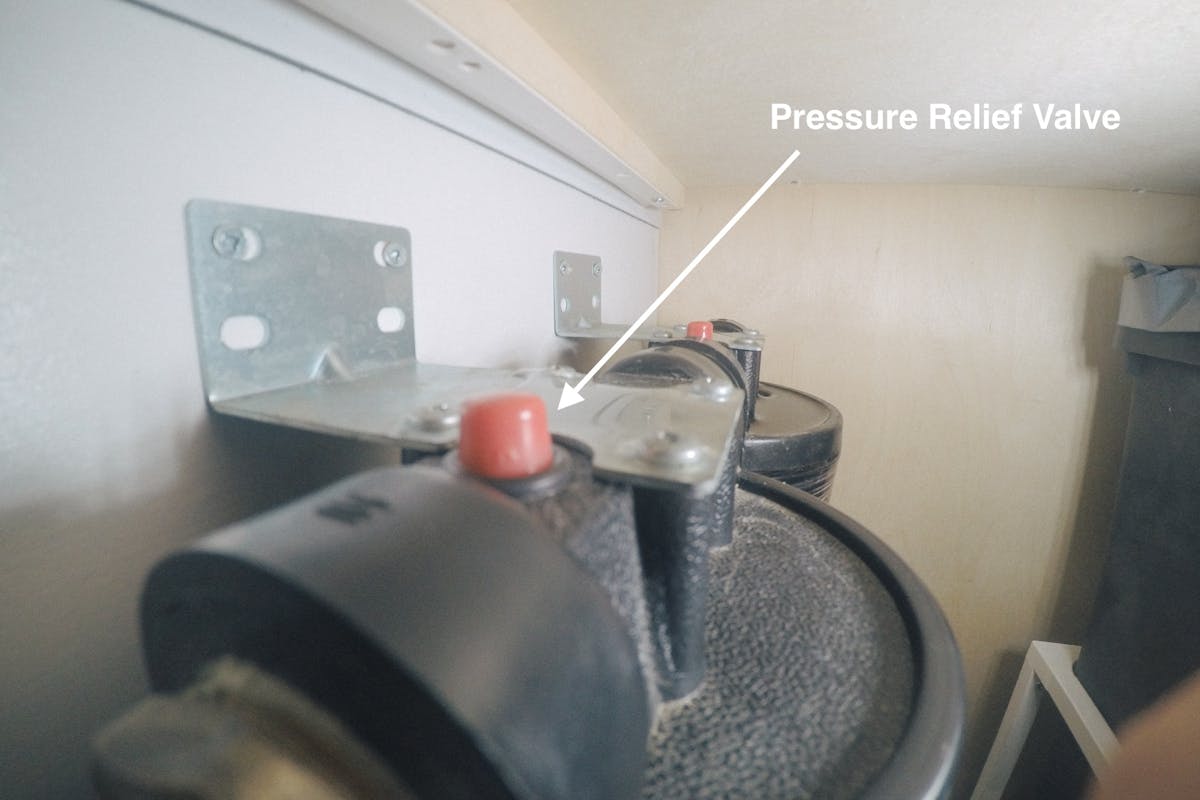
Airlock in the Pump
Frequently my water pump will develop an air lock in the pump, this mainly happens when the freshwater tank is less than 50% full and the intake pulls a bit of air as the van drives down the road. At first it would take me forever to fix the problem but I’ve found the simplest fix is when this happens to simply press the pressure relief valve on the water filter canisters which allows the air to purge from the system and the pump will start to work properly again. This happens to me on a regular basis but it only takes 2 seconds to fix it using this method.
Ability to Blow out your lines
A handy feature on my van that was installed before before the water pump was an air blow out line. This lets me quickly hook up an air compressor and blow out all the lines in the vehicle making winterizing the van a super simple process and something I highly recommend doing if you plan on taking your vehicle into colder climates. The option of just using a gravity clean out system will work in theory but you can never be 100% sure that you have removed all of the water from the system. One thing to note about using compressed air to blow out your system is that you never want to blast 100 plus PSI into the system as you could risk damaging seals in the pump and toilet and other areas of the plumbing, I have a valve right after my air hook up that I can use to regular the amount of air I am pushing through the system.
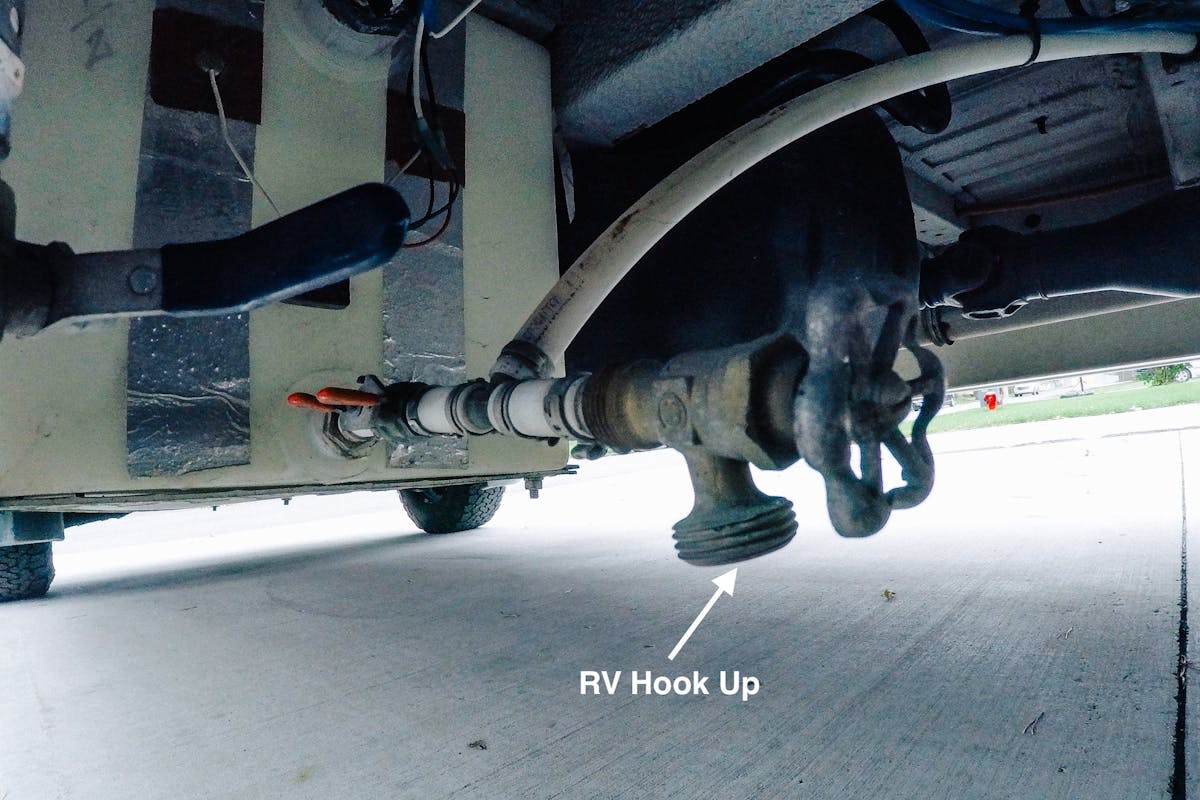
Never using RV Hook-Up
So in all my travels to date I have not used the RV water hookup option I installed on the van a single time…. That being said it didn’t take much time to install the ability to hook up to a RV water style connection or city water so I would probably do it if I built another van but just an FYI it’s never been used.
Tank Mounts
During the van build process one of the things that had me second guessing myself the most was the tank locations and mounting of the tanks. Once I had figured out the size and location of the tanks I still had to figure out a way to fasten them in place. The easiest a simplest solution was to have some metal brackets bent and then I just used self tapping screws to mount them in place. This method worked for every tank except the water tank which as I mentioned above I had bottom out on my once really bad and it bend the mounts….but they didn’t break. So for this tank I had a steel bracket made that fastens on one side to the hitch and the other side to the spare time mount. This bracket holds the tank in place but also provides the needed protection if the van was to bottom out again.


Gallery
VIEW ALL


Author
Scott Adamson
Vanlife aficionado with his rescue dog Ellie. We travel around North America in search of good times and fresh coffee.