Summary
Insulation is where people end up spending the most amount of time researching. Not only is there an endless amount of options, but it also happens to be the very first thing you’ll do to start your van build.
Look:
At this point you’re still under the impression that every decision is going to be make or break and that it might potentially ruin the entire build….
Let me start by telling you that as you get further and further along, the decisions become much, much easier…. I’d say it’s somewhere between tossing in the ceiling fan and cutting in your first window where this starts to happen.
So rather than spend a year of my life writing an article that talks about the difference between hundreds of insulation types, along with their PROS and CONS, I’m just going to talk about what insulation I used and why I selected it.
Thanks to my Espar Heater keeping an interior temperature around 16-18C, I’ve had my van in -35C and got by just fine. So even though I might not have the best insulation in the entire world, it works for me.
My van build spanned 3 different seasons, including the dead of a Canadian winter, and was all done outside of a garage. For that reason, I’m pretty confident in my process and its ability to keep the van at a manageable temperature even in the harshest of winter climates.


Tools used

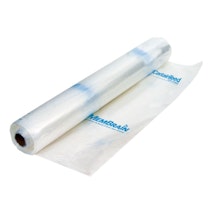
Vapor Barrier is a material used for damp proofing, typically a plastic or foil sheet, that resists diffusion of moisture through wall, ceiling and floor assemblies of buildings to prevent interstitial condensation and of packaging. Some people choose not to install a vaporizer barrier in their vans but since I had planned on using my van in the winter and heating the interior of the van I decided it was a wise decision to install after the insulation process on the van.
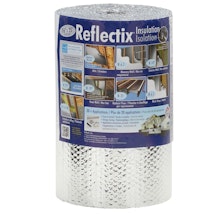
Reflectix is a very versatile product that's used in many van builds. It’s a great product because it inhibits condensation, no mess, mold and mildew resistant, and it’s lightweight. The biggest reason for using it in my build was because it reflects up to ~90% of radiant energy. On the Reflectix website you’ll see varying amounts of different R values promoted. Overall, I think the actual insulation value provided by the Reflectix is quite low but it's ability to reflect is the biggest reason I chose to install it in my build. The cost of the product and time to install it makes it almost negligible, so why not toss it in.
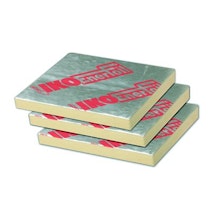
For the bulk of my insulation, I decided to go with Polyiso Insulation with a foil backing. Polyisocyanurate (polyiso) is a closed-cell, rigid foam board insulation consisting of a foam core sandwiched between two facers, usually a metallic foil. The reason I chose to use Polyiso for my build was that it was very easy to work with and it has the highest R-Value per inch. For a long time I had debated using a spray foam application on the build but after reading so many horror stories of people who wrongfully applied the material and damaged the outside sheet metal of their van, I was scared away. I think both Polyiso and Sprayfoam are good options, but I just wasn’t willing to take the risk at ruining a new van. Since I wanted a material that I could handle myself, Polyiso was the obvious winner for me.
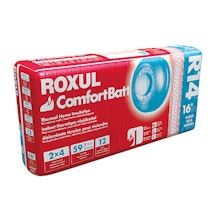
It’s nearly impossible to get the rigid insulation to fit perfectly in some areas of the van. In the areas where I need to be able to stuff the insulation in the various nooks I chose to use Roxul Batt Insulation. It was inexpensive and really easy to work with.
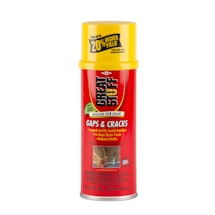
There were a few areas where I couldn’t get in when using the Roxul insulation. To block those areas, I used cans of spray foam…. I'll be the first to admit that this was a very slow process. At this stage of the build I felt like I was in a bit of a rush, thinking I would be done in 2 months… So if I could go back to the van build I would have taken more time to completely fill all of the cavities that I couldn’t get insulation in. With that being said, I’ve had the van in -35c with an Espar heater and I can get the interior to 18-20c.
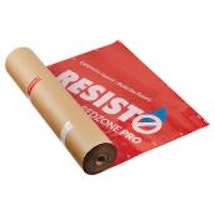
When researching your van build, you’ll find that almost everyone uses some sort of sound deadening material. The most common are rattle trap and Dyna Matt. Although I do think that a sound deadener of some sort is a great idea, I didn’t use either of these materials. Instead I decided to use Resisto Peel and Stick which is a foundation waterproofing material you can find at Home Depot. This material was a fraction of the cost and seemed to do a fairly good job at getting rid of the tinny echo in the van.
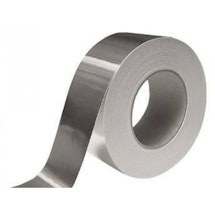
Foil tape was used on the floor of the van once I laid the sheets of Polyiso board to seal off the seams. I probably could have used any construction tape here, but I went with the Metal Foil tape because I was using foil backed insulation.Overall lifespan of foil tape is far greater than most other alternatives that could have been used. Also, foil tapes are known for having extreme temperature versatility which makes it a great option for a product being used in an all season conversion.
Tuck Tape is made of UV resistant poly propylene film and is coated with high shear, high tack solvent based acrylic adhesive. Applications include sealing of joints and seams of house wrap, insulation materials and foam underlayments for laminate flooring. While I was hanging the Polyiso insulation on the walls, I found it super handy for holding on the insulation while I waited for spray adhesive to dry.

Install Process
Walls
The following is the order in which I installed the insulation into the van walls.
1.Sound Deadening Material


The first step for me was to install the sound deadening material. For this, I used Resisto which is actually a peel and stick waterproof membrane for home foundations. It was considerably cheaper to use than the proper materials and it seems to do the trick of reducing the tiny sound created by all the large metal panelling in the rear of the van. When installing the resisto on the sides and the ceiling, I just cut rough squares to size and stuck them in place. The idea behind this type of product is simply to remove some of the vibration that’s caused which therefore reduces the amount of noise you’ll hear when driving. You can tell the difference just by knocking on the side of the van before and after installing the product.
2. REFLECTIX

After Installing the sound deadening material on the walls and ceiling, the next step was to install the Reflectix. I used reflectix on the ceiling in between the ribs of the van. To install it, I used some 3M spray adhesive and sprayed both the area I was placing the material and the back of the reflectix before tacking it in place. The actual insulation value of the reflectix is fairly minimal but the install is quite easy and is supposed to add an additional radiant barrier to help stop the suns heat from penetrating into the vehicle.

I also decided to add reflectix inside the large middle areas of the van where the windows would be placed on the passenger version of the sprint van and overtop of the wheel wells on both sides of the vehicle to assist with road noise.
3. Install PolyIso Insulation
Once I finished the reflectix install, it was time to install the PolyIso Insulation. The polyiso was used in the larger symmetrical areas of the van where minimal cutting and fitting was required such as the ceiling, floor and large middle areas on the sides of the van.

Cutting the polyiso is easily done with a utility knife and straight edge making this stage fairly quick and easy to manage by yourself. To install these large sheets, I used a combination of spray adhesive and tuck tape to hold the pieces in place until my wall panels were installed. On the ceiling I was able to cut the section tight enough to friction fit the pieces in place which made installing the ceiling sections one the fastest and funnest parts of the insulation phase.
4. Roxul Insulation
When you get inside your sprinter van, you’ll quickly notice how many different nooks and crannies there are in the bottom and top sections. This makes using the polyiso insulation a rather time consuming task. So instead of using the polyiso in these sections I opted to use roxul batt insulation which was super easy to work with and made it possible to jam into all the hard-to-reach places on the van including inside all of the door cavities.


5. Spray Foam
The last bit of insulation on the walls and ceiling that I had to complete were the channels that are located in the ceiling ribs and right below the areas where the windows are located if you have the passenger version of the vehicle. For these sections, the access holes are quite small making it nearly impossible to stick in the roxul insulation. My only option was to get some cans of expanding spray foam to insulate these areas.
6. VAPOR BARRIER
Once 95% of the insulation was complete I could go ahead and install the vapor barrier over the insulation in the van. The vapour barrier is super easy to install…..if you have two people. I tried to do this on own but the size of the sheets makes it awkward and difficult to manage by yourself. I cut the pieces to rough size and then tapped one edge in place using tuck tape, then I sprayed the plastic and the insulation with spray adhesive, and finally tacked it in place. The spray adhesive did an excellent job at holding the vapour barrier in place, making it so I didn’t have to worry about it falling down or using tape everywhere to hold it in place.

Floor Insulation
For the floor insulation, it’s more or less the same application except I didn’t use any of the spray foam or roxul insulation. I know a lot of people that chose to only insulate the walls and ceiling and not bother with the floor. Personally, I’m so glad that I took the extra half day to insulate the floor. Even though I’m able to get the van to around 20°C in the winter with the Espar Heater, the floor still remains cold and I need to wear slippers while walking around. I couldn’t imagine the amount of heat loss I would get if I didn’t take the time to quickly insulate the floor of the van.
1. Waterproofing
The first step for me was to install the same resisto peel and stick membrane that I used on the walls and ceiling as a sound deadener on the entire floor of the van. The resisto on the floor not only acts as a sound deadener but it also waterproofs the entire floor of the van since that was actually what this product’s intended use is.

2. Fill in floor ribs
After I installed the resisto over the entire floor of the vehicle, I needed to put some wooden strips in the ribs of the floor. I just quickly cut some plywood pieces about 2 inches wide by 2-3ft long and secured them in place with a little bit of construction adhesive made my PL. By taking the time to level out the floor, it ensured that when it came time to install my flooring I was working with as flat and level of a surface as possible.
3. PolyIso Insulation


Once I filled in the low points between the ribs in the back of the van, I began to lay out the polyiso insulation. For the flooring I decided to use ¾” thick insulation in order to maximize the head space that remained in the van once completed. After I had cut and dry fit all of the insulation, I pulled it up and placed construction adhesive all over the floor and then stuck the insulation back down. Since the insulation I used was a foil backed polyiso I decided to tape the few seams I had on the floor with a foil tape. My thought process here was that if moisture did find a way to get to the insulation it wouldn’t be able to seep through the seams between the insulation panels.
4. 1/4 Plywood Floor

Once my floor insulation job was finished, it was time to install a subfloor in the van. Since my van was brand new, it came with a nice ¼” thick plywood floor that was already cut and ready to fit the van. All I needed to do was reinstall this over the polyiso insulation. Due to the fact that I had built up the floor on the 3/4 of an inch with insulation, the factory fastening system for the floor would no longer work. What I ended up doing was use a Forstner drill bit to counter sink self tapping screws through the plywood and into the metal floor of the van. One thing to note in using this method of fastening the subfloor to the van is that you are left with multiple screw penetrating the underside of the vehicle that will rust over time, so in order to eliminate that I used a automotive sealant for installing windshields and covered all of the exposed screw on the underside of the vehicle to stop them from rusting over time. The product I used looks very similar to a roofing tar and when it dries on the screw under the van it remains pliable and soft to the touch, so it won’t dry out, get hard and just fall off.
5. Vinyl Laminate Flooring

I decided to use a vinyl laminate flooring in the van. The reasons I went with the vinyl laminate was because:
- It’s super thin
- It’s moisture resistant
Installing the flooring is pretty straight forward. You just need to make sure to take your time and get all your seams nice and tight. While using the flooring that I chose, I discovered that once the sticky sections of two flooring pieces touched each other, there was no chance at ever getting them apart. Just take your time and it will turn out awesome!
Pro Tips
Careful with door mechanism
When insulating the sliding and rear doors of the van, make sure the insulation doesn’t interfere with the internal door mechanism
Careful with spray Foam
When I first started researching the van build I had thought that I wanted to use spray foam, but after reading a few stories of people that had used spray foam and had it warp the outer panels of the van, I chose to go an alternate route. If you’re going to use spray foam be careful. It’s probably a wise decision to have a professional handle that for you.
Map out your electrical before you insulate
I was pretty eager to get started once I had purchased the van and the easiest thing for me to start was the insulation. Looking back and knowing what I know now, I would have planned out my electrical prior to insulating and ran some of the wires before hand.
Wait on the flooring
I would suggest leaving the flooring install to one of the last things you complete on the van for a few reasons. The primary reason is that you won’t risk damaging the floor during the construction process, but also you will need half as much flooring if you only install the flooring where it can actually be seen.
Another note on the flooring is that when using a vinyl laminate, it’s a good idea to leave a bit of a gap around the perimeter so the floor can expand and contract without causing issues. Currently, my flooring will bubble when in direct sunlight due to the expansion. I’ll be fixing that soon!
Gallery
VIEW ALL


Author
Scott Adamson
Vanlife aficionado with his rescue dog Ellie. We travel around North America in search of good times and fresh coffee.