Summary
Before I get into detail, I’ll start off by telling you that cutting a massive hole in the side of a brand new van isn’t actually as scary as you might think.
When mapping out my van build, I had to really think about where I wanted to have my windows. Luckily, my van already came with 2 windows in the back doors. All I had to worry about was a single window install.
After looking over my designs, it made most sense to install my window on the drivers side/middle section of the van. Overall, I’m really happy with the decision. It also allows me the flexibility knowing that I can still install a window in the sliding door at some point in time… If I feel so inclined.


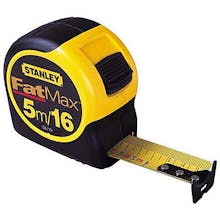
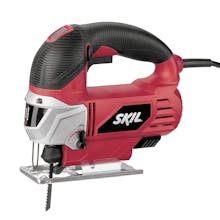
Tools used


If your van didn't come with the factory windows already installed, you're probably getting your windows from CR Lawrence. Just make sure you order the right windows for your project.
Sprinter Window

I used painters tape for a lot more than just painting. Painters tape is great because it doesn't leave a sticky residue so you can use it to hold things temporarily in place and template out different aspects of the van.
Install Process
The first thing you’re going to want to do is ensure that you’ve ordered the correct window and all pieces required for the install were shipped in the box you received.
The next step is the first hard part….drilling holes into the outside of the van. Don’t worry! After you do one it gets much easier. I started by drilling out holes in all four corners on the interior of the van. Each corner got two holes on either side of the radius so that I could move to the outside of the van and connect all of the holes using a straight edge, following a cut line.

A quick note when drilling the holes is that you should always start with a small drill bit and keep increasing the size slowly till the hole is large enough to fit the jig saw blade.

When cutting out the window hole, you need to follow the double wall thickness as closely as possible because the window dimensions from CR Laurence are a perfect fit. While I was cutting from the outside of the van, I found it helpful to have my Dad on the inside to make sure I was right on the line.
Once the cut lines were mapped on the outside of the vehicle and the surface was taped off, it was time to start cutting out the sheet metal where the window will sit.


To avoid causing unwanted warping and bending of the remaining sheet metal, be sure to take your time and focus on making the largest cuts first. This will make sure the sheet metal still has some rigidity.
Once you’re finished cutting all the way around the window opening, it’s time to grab the window and see if it fits properly in the opening. This step, along with everything else in the window installation, is much easier with a second set of hands. When I cut the window opening, I was so scared about taking too much material out that the window didn’t actually fit the first few tries. I had to go back and remove more material down the double wall area of the cut out.

Now that I knew the window properly fit in the opening I removed the window and used a Tremclad metal paint to cover the bare metal edges before permanently installing the window.

After the paint has dried, it’s time to install the window for good. The window kit comes with an easy-to-install mounting bracket that is installed from the inside and sandwiches the window in place. All you need is a screwdriver or drill and someone standing on the outside holding the window in place while you fasten it in place.
One thing to note is that periodically you might have to check these screws in future. After about 5 months in the van, a few of the screws had loosened due to the bouncing around of the van. Eventually it caused the window to leak a bit. It wasn’t a big deal as all I had to do was tighten up the screws, but if it happens again I might consider using some LocTite on the screw to stop it from happening a third time.
Pro Tips
Window needs to fit perfectly
The biggest concern I had was how precise the window cut needed to be. These windows are made exact and as long as you follow that interior double walled edge, it will fit like a glove.
Window doesn't sit flush
Once installed, you will probably think that the window looks like it’s not sitting flush to the vehicle. Well… you’re correct! These windows are designed to be installed all the way around the vehicle in which case all the seams would line up. Trust me when I tell you that this is something you will quickly forget about.
Trace the interior wall
Once the window is cut, take the opportunity to trace out the opening for the wall panelling from the outside of the vehicle. Otherwise, it will be really difficult to map out and get the wall panelling to perfectly outline the window. So once the sheet metal was removed I tacked the wall panel in place on the interior and then went outside the vehicle and traced a cutline onto the panel.
Middle windows
When mapping out the window placement on your van, keep in mind that the middle window option on the 170 van currently doesn’t have a model with any openings. So if you want to have an opening window in the rear of the vehicle on the drivers side, it will need to be in the rear or forward position in the back of the vehicle. I have considered putting in a sliding door window as they make that model with an option that opens for better airflow.
Gallery
VIEW ALL


Author
Scott Adamson
Vanlife aficionado with his rescue dog Ellie. We travel around North America in search of good times and fresh coffee.